Scrappy Little Planner {Tutorial}
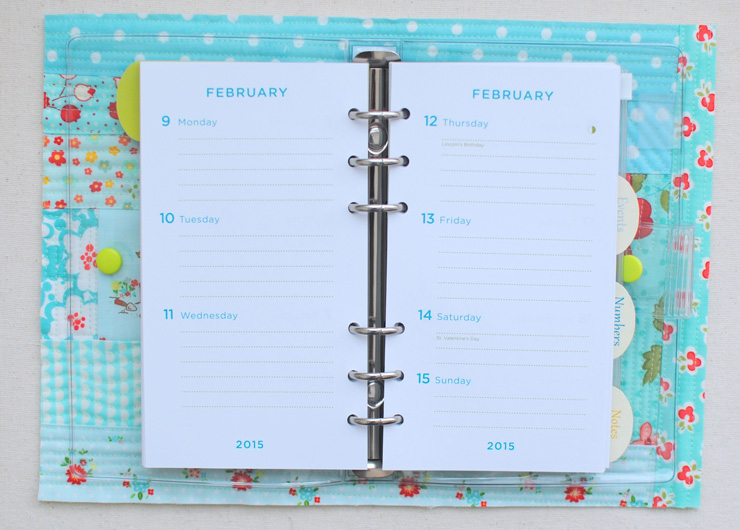
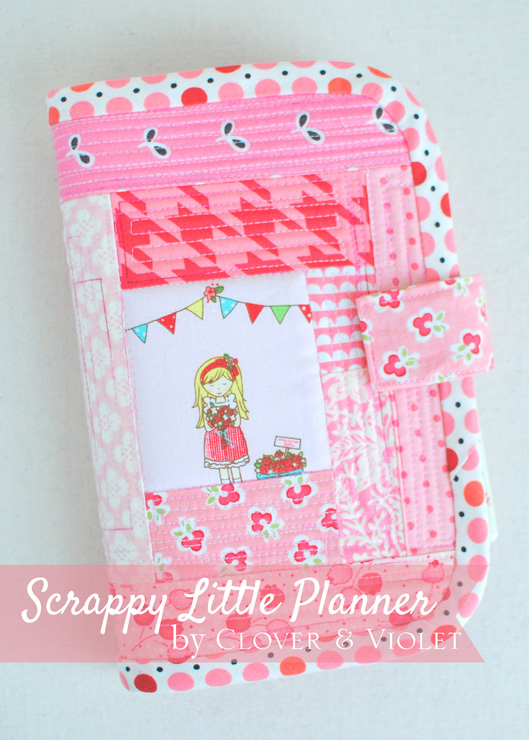 Paper planners seem to be everywhere these days. I know lots of people use their phones and other electronic devices for their calendars, but to me {and apparently lots of other quilters too!} you cannot get much better than real paper. So, it only seemed appropriate to put a little sewing and quilting and planners together, and I came up with this scrappy little planner. You could make this cover for a variety of planners, but I’m using this Punctuate Vinyl Planner that I bought from Barnes & Noble for $5, since it was 50% off. I found some on Amazon for a little bit more, but still less expensive than a leather planner.
You could also use a mini binder like this one or this one, and just adjust the cover size a little bit! Or, you could cover a regular notebook, if the rings aren’t important to you.
You’ll need:
- Binder or Notebook
- Scraps
- Batting or Soft and Stable 1/2″ larger than your binder
- Hidden Magnet or Velcro
- Bias Tape
- Foldover Elastic
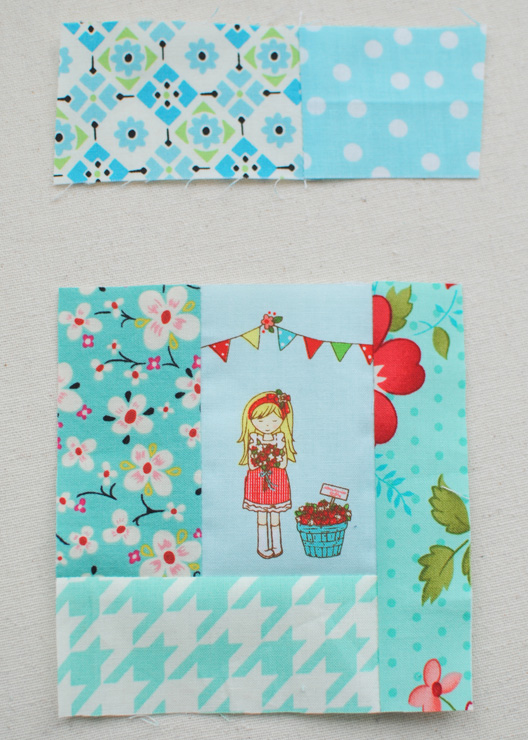 Begin piecing your scraps in any manner you choose. I chose two fussy cut girls from Tasha Noel’s The Simple Life and centered my piecing around them.
 I sewed my pieces on log cabin style, but pieced some of the longer strips first to give it a bit more dimension.
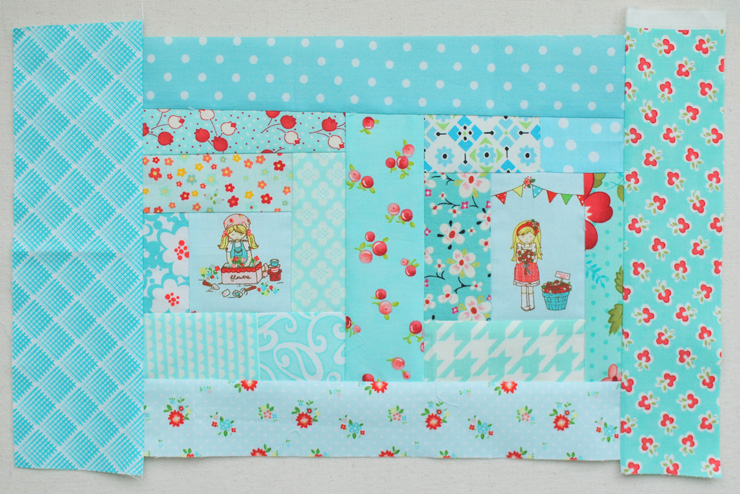 I created mine in a front piece, back piece, then joined them in the center with another strip. I then added the final borders to make it 1-2″ larger than the planner. You can make the patchwork the exact size of your finished cover (about 1/2″ larger than the planner), if you don’t want to waste fabric, but I like having it over sized so I don’t have to worry about any shifting or it being too small.
 Being careful to check the polarity, sew the magnet to the wrong side of the patchwork piece where you want your closure. I centered mine next to my fussy cut girl, since I wanted her to be near the edge.
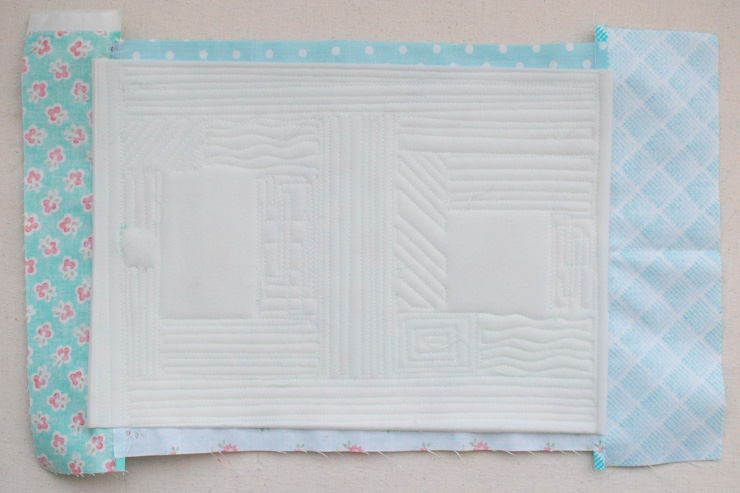 Cut a piece of Soft and Stable or a double layer of batting about 1″ larger than the planner (again, if you’re not worried about shifting, you can cut it to 1/2″ larger which will be the exact size).
 Quilt as desired. I used a walking foot which made the quilting much easier. I did a different pattern in each piece of patchwork.
 Trim the patchwork to 1/2″ larger than the planner {1/4″ on each edge}. Cut two pieces as tall as the planner and 1/2″ narrower. These will be the inside pockets you’re going to slip the planner into. Fold them in half, wrong sides together and press. I then sewed right along the folded edge to finish them.
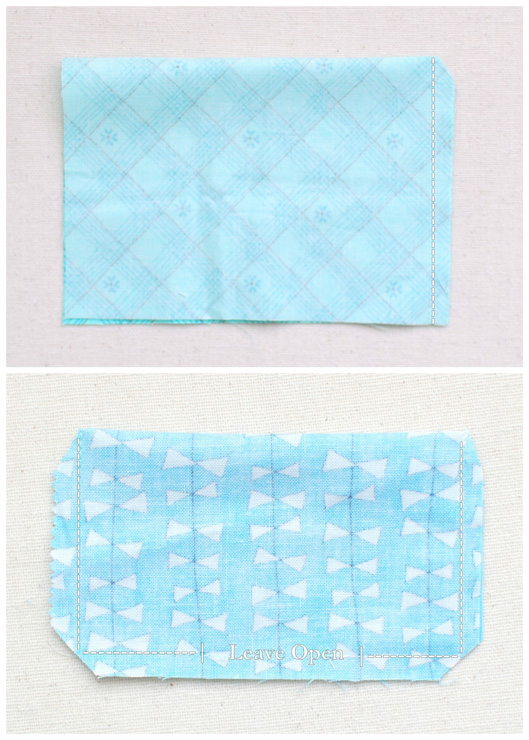 To make larger pockets for the inside, use a scrap twice as tall as your finished pocket height and 1/4″ wider than the inside piece. Fold in half and sew one side at 1/4″, then turn clip corner and turn right side out. Line up the raw edges with the side and bottom of the inside flap and sew along the side.
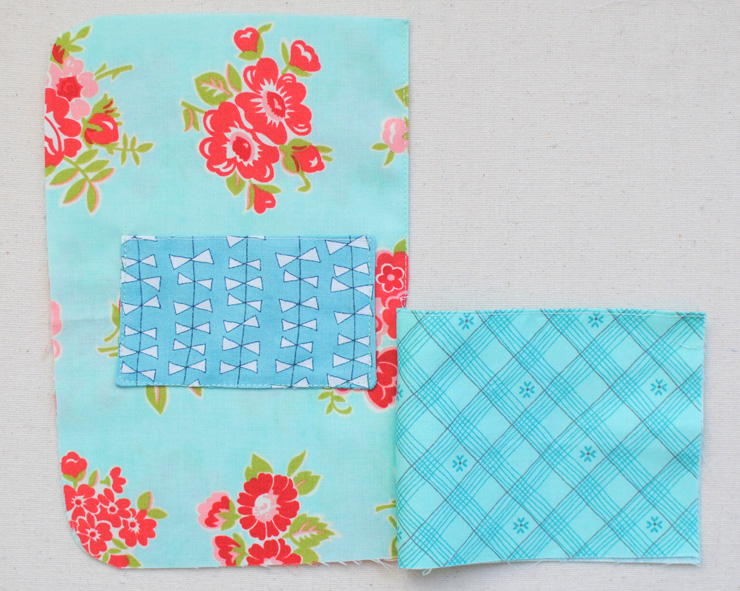
I also made a patch pocket out of a 6″ x 4″ rectangle. Fold in half and sew on three sides, leaving an opening along the bottom. Clip corners and turn right side out. Then sew to the inside flap.
Here you can see how I sewed the patch pocket and then sewed the larger pocket along the side {it is flipped open so you can see the patch pocket underneath it}.
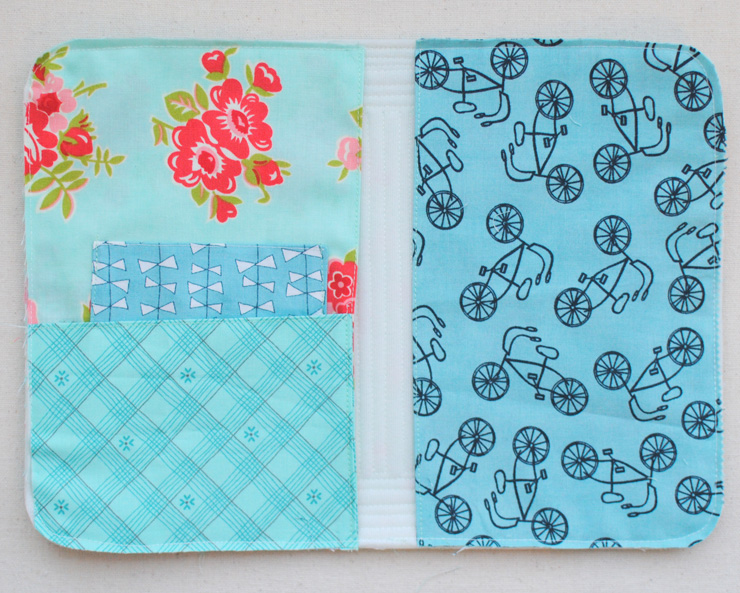 Place both inside flaps on the wrong side of the quilted piece. There should be a gap about the size of the ring portion of the planner in the center. Sew along the sides, also sewing the large pocket down. Round corners if desired {I just cut curves, but you could use a round object too}.
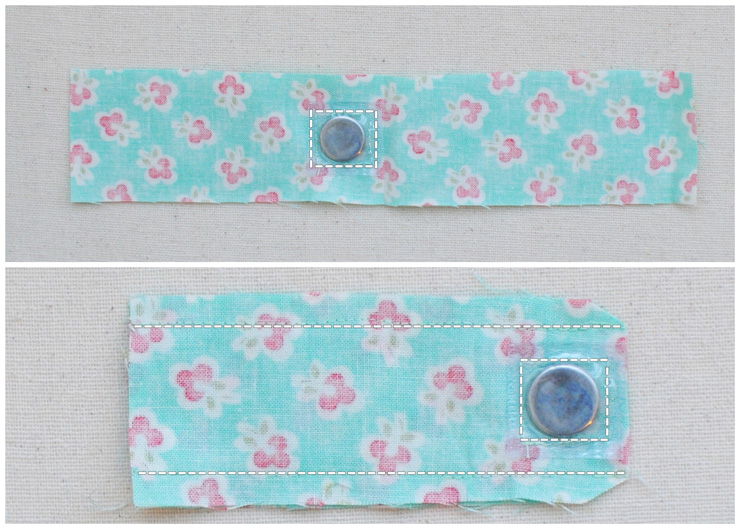 Make the magnetic flap by cutting a strip 1 3/4″ x 8″. Fold it in half {1 3/4″ x 4″} and crease. Then sew the magnet right next to the crease. Fold in half again, right sides together, then sew the long sides, back stitching at the end. Turn right side out and top stitch along the edges.
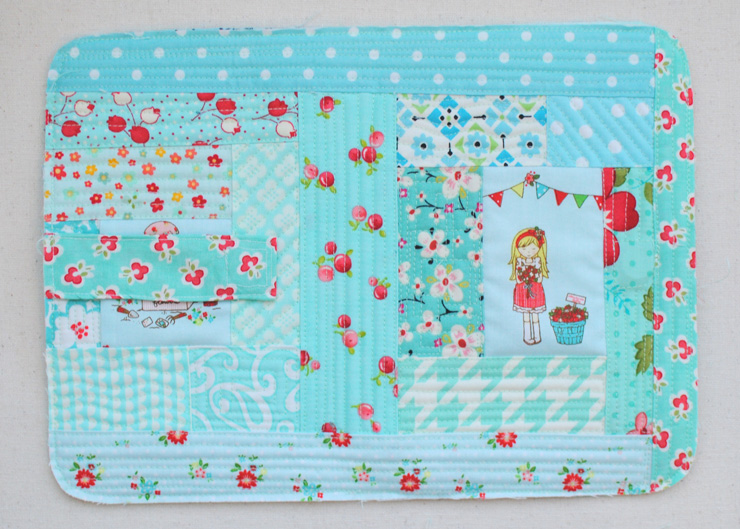 Sew the flap along the edge of the back of the patchwork planner body, opposite the magnet, and double checking the polarity.
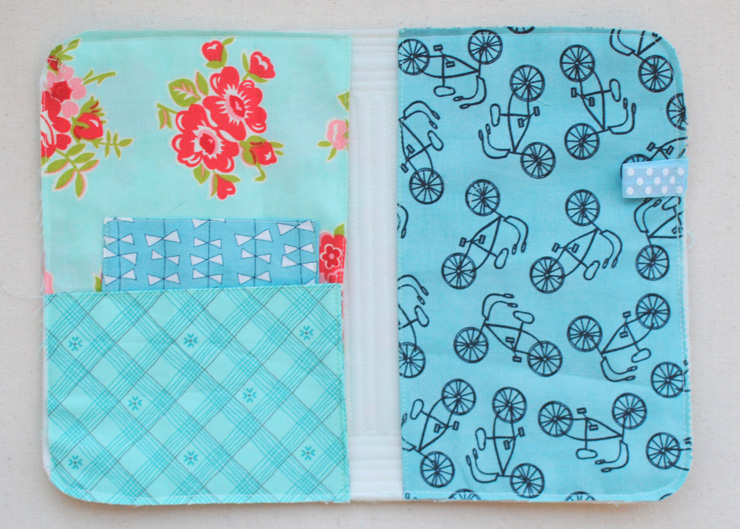 Sew a 1″ loop of fold over elastic to the back of the planner as well, about 2″ from the top, for a pen holder.
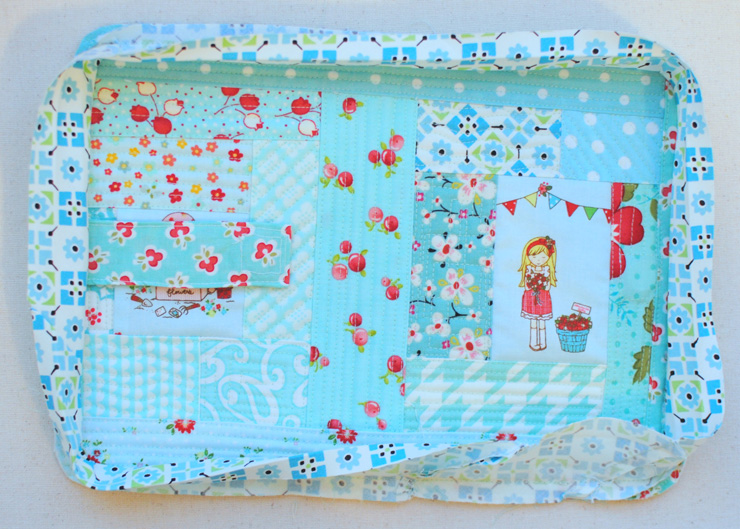 Sew the bias tape to the outside of the organizer. You can use premade bias tape {as I did for the pink planner above} or make your own. For this planner I made 1/2″ bias binding following this tutorial from Sew 4 Home. One little note, I’ve noticed, as I’m working on learning how to do curved binding, that when you reach the corners, think of pulling the binding back rather than stretching it forward around the curve. This really worked for me!
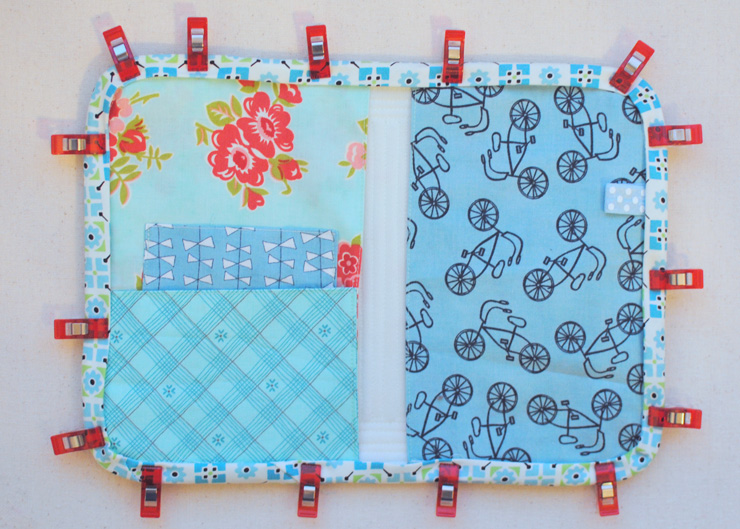 Fold the binding around to the inside and sew in place. I hand stitched mine, but machine stitched would be great too!
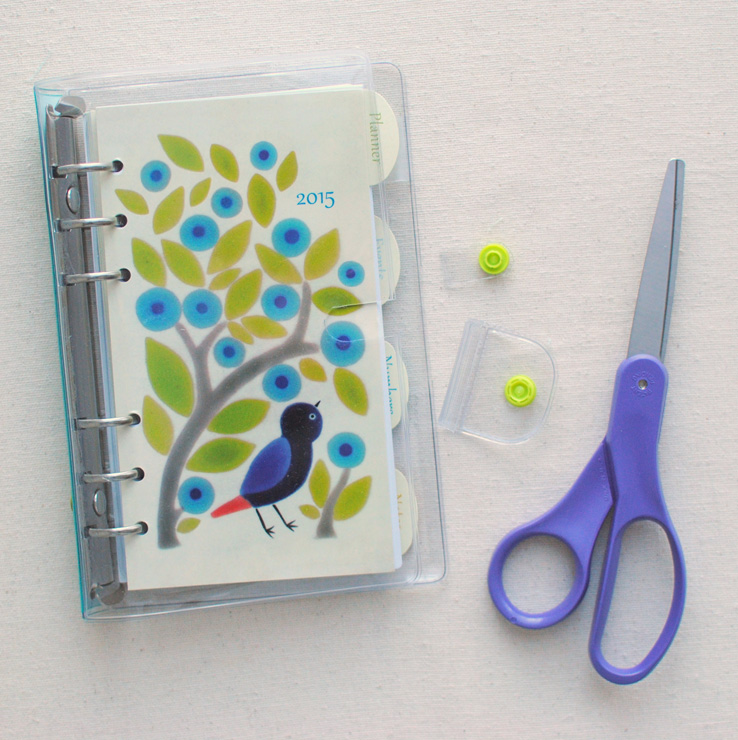 Next, cut the snaps off of the vinyl cover of the planner. If necessary, trim the body of the planner to fit inside the flaps. I cut about 1/8″ off the edge of my planner all the way around, and made the corners a little more curved too.
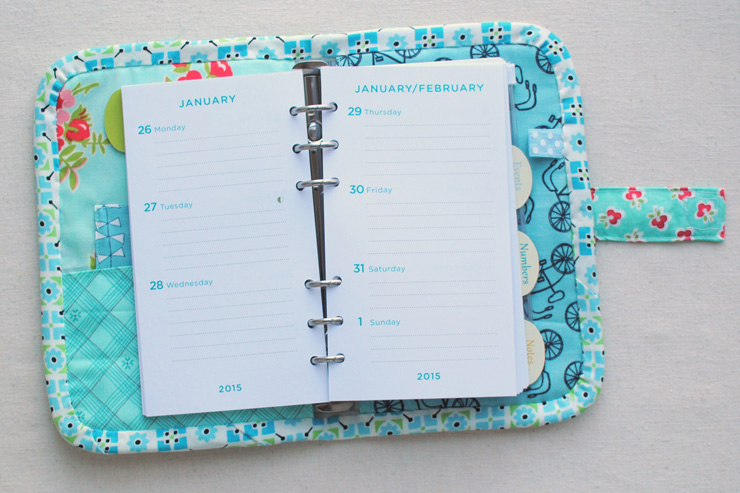 Then slip the planner under the flaps and you’re done! As an option, you could also sew the planner to the cover, to keep it more secure. I’d recommend using a leather or jeans needle.
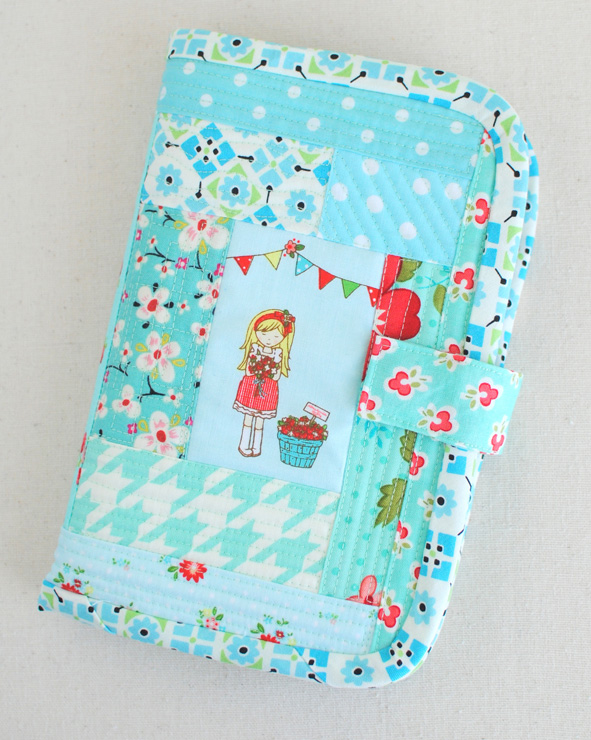 And, there you have a fun planner, exactly your style! And, if you make one of these, make sure to let us know! Send us an e-mail, share in our Flickr group, or tag @cloverandviolet #scrappylittleplanner on social media!

So cute! Thank you for sharing this great tutorial. Have a good weekend!
Jennie that is so sweet! I think I may have to run to B&N this weekend!
This is so adorable! Perfect!
Love this pattern! Thanks so much for this great tutorial!!!
Love this! You always have great tutorials!
This is so cute!! I am thinking you could even make these for book covers and take a paperback along somewhere. I think this definitely has a lot of possible uses, and now I wish I had one for my little planner!
I love red zippers. The colors are happy and I love that the hexies are appliqués! What a clean look. I am currently addicted to bags, reflect for pretty leftovers. Well done Jennie and thanks for the tutorial and PDF!!!!
Pretty, pretty, pretty! I am in love with the fabric you’ve used. I live in South-Africa and envy your availability of beautiful fabrics. Love this collection!
It is ideal for both: a tourist along with business traveller.
That is the reason, you need to have pieces of furniture which might be
tough and may endure being used by many different people.
If you’re staying somewhere warm, you’ll probably want an outside pool.
47e4e03ff861ba4897be9e0949467883
hej,
this is such a cute tutorial for a planner.
can you see it on my blog? i linked your blog in my post…
http://ulrikes-smaating.blogspot.dk/2016/11/planer-und-stifteetui.html
greetings from denmark
Ulrike :0)