Last-Minute Gift Tutorial: Vinyl First Aid Pouch
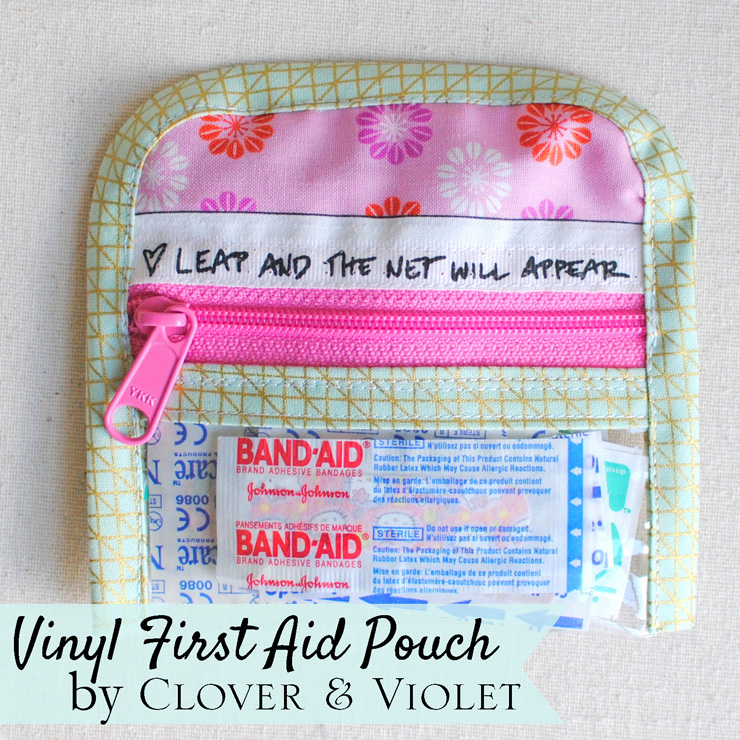 Here’s another fun, last-minute gift idea for you! I always carry bandages, hand wipes, some scissors, and a couple other things in my purse. They’re usually floating around with a bunch of stuff and I can never find them when I actually need them! So, I made up this little pouch to keep them all together and thought I’d share this tutorial with you!
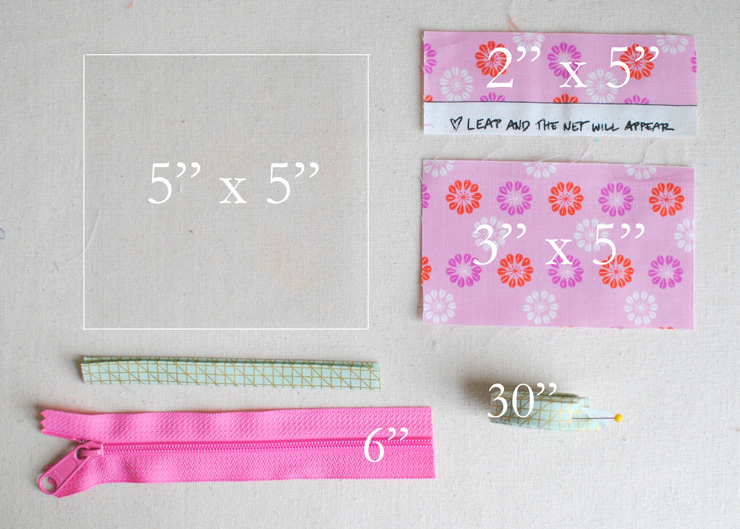
- 5″ x 5″ square of vinyl {I used 8 guage}
- 2″ x 5″ rectangle of fabric with a salvege edge
- 3″ x 5″ rectangle of fabric
- 6″ zipper
- 30″ – 1/2″ bias tape
Tips for sewing with vinyl:
- Set your machine to a longer stitch length when working with vinyl to avoid perforating the vinyl.
- Use a Teflon foot on your swing machine, or put a piece of tape on the bottom of your regular presser foot
- Put a piece of tape on your sewing machine under teh presser foot to allow the vinyl to slide along more easily
 Sandwich the vinyl between one 5″ length of bias tape, stitch in place.
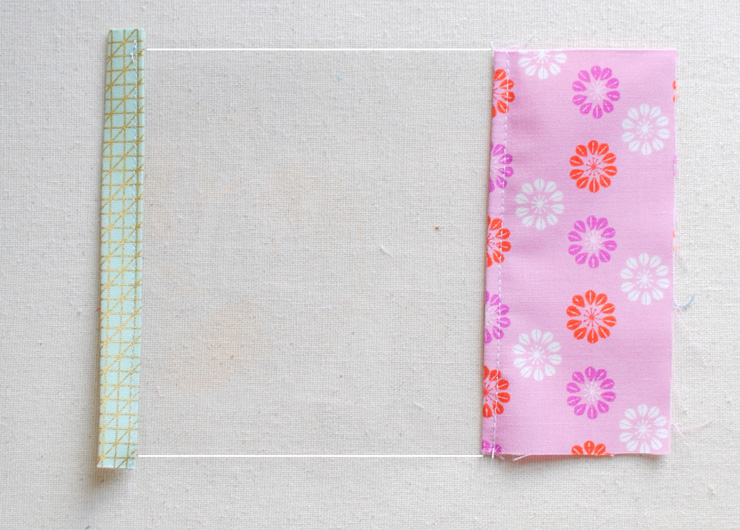 Wrong sides together, fold and press 1/4″ along one 5″ edge of the 3″ x 5″ fabric rectangle. Opposite the bias tape, sew the folded edge of 3″ x 5″ fabric rectangle to the vinyl, right side down. Unfold the fabric so that the right side is up and stitch again along the folded edge, through the vinyl, finishing the edge.
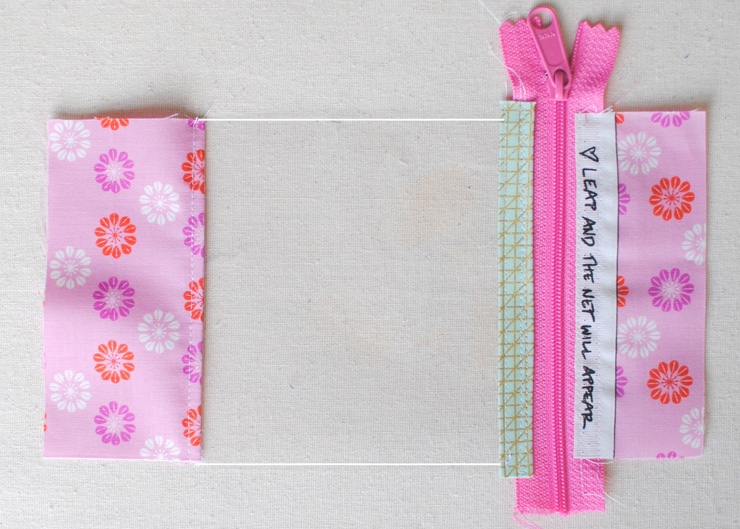 Sew the bias tape edge to the bottom of the zipper. Then sew the selvage edge of the 2″ x 3″ fabric rectangle to the top of the zipper {if not using a selvage piece, fold the edge 1/4″ and attach in the same manner as the other fabric rectangle}.
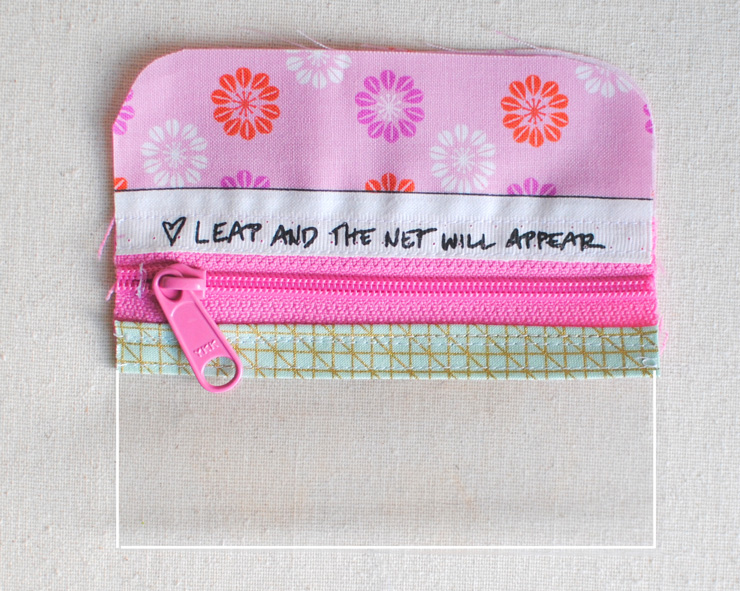 Trim the edges and zipper to 5″. Fold in half with the vinyl at the bottom. Round corners if desired {for an easier finish, leave corners square}.
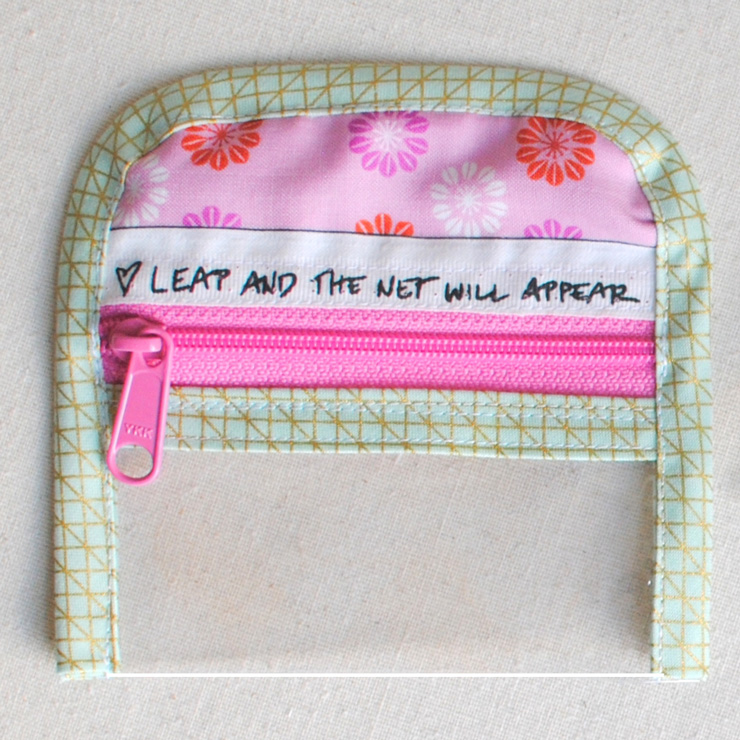 Fold 1/4″ of one edge of the bias tape toward the wrong side to finish the edge. Beginning at one folded edge of the vinyl, sandwich the bias tape over the raw edge of the vinyl and around the top, gently shaping at the corners. Trim the bias tape to 1/4″ longer than the pouch and fold the other raw edge toward the wrong side. Stitch bias tape in place.
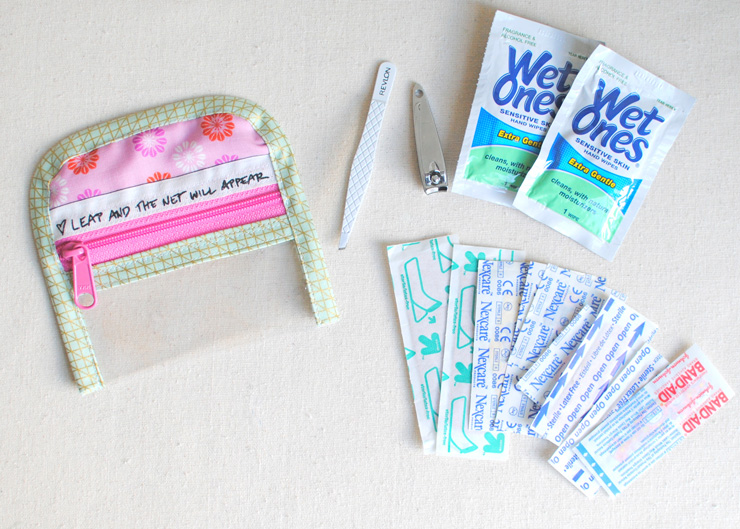 And, fill your pouch with all those little things you need to carry with you! This would make a great stocking stuffer or teacher gift! Enjoy!

He he. If you have “Believe an the net will appear.” as a life philosophy, you may need a few band-aids. I’m just kidding. I enjoy Cotton + Steel too. Great project.
Jennie, this is so sweet. I am going to try making some of these soon! Love for all of you! XOXXO
Another great gift idea! Thank you for the tutorial!
This is so cute and functional. I’m going to make several of these for our vehicles. Thank you for sharing.
I love the little hand written message … every mummy needs one of these!
This is adorable! Thanks for the great idea. I loved the tea mat idea your mom shared the other day, too.
What a perfect, little fussy-cut message! Love the pouch
That’s a great little first aid pouch! I’ve got a Craft Gossip post scheduled for later today that links to your tutorial:
http://sewing.craftgossip.com/tutorial-vinyl-window-first-aid-pouch-you-can-slip-in-your-purse/2015/01/05/
–Anne
I like pouch. This little idea for making these project are so beautiful. I am waiting for the next post. Thanks for sharing.