Mini Medallion Series : Border 1
Hello again C&V readers! I hope those of you in the States enjoyed the holiday yesterday!
It’s been so fun seeing all your center blocks for this fun mini medallion! Keep sending me links in your comments and tagging me @sewlux on Instagram with #minimedallionqal !
Are you ready for your first border?
(Missed out on the center? Learn more and get the pattern here.)
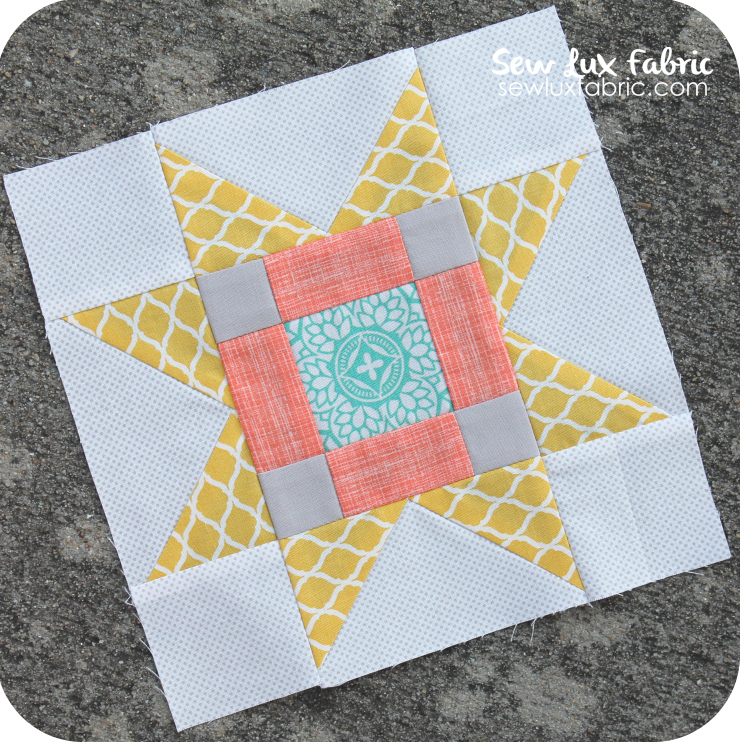
Month 2 – Sew Border #1:
Cut the following:
- From Background: Cut four 2.5″ squares and ten 3″ squares
- From each of 2 Peach Prints: Cut five 3″ squares (you’ll need a total of ten squares)
- From each of 4 Teal Prints: Cut one 1.5″ x 4.5″ and one 1.5″ x 5.5″ rectangle (you’ll need a total of four of each of the two sizes of rectangles)
Sew as follows:
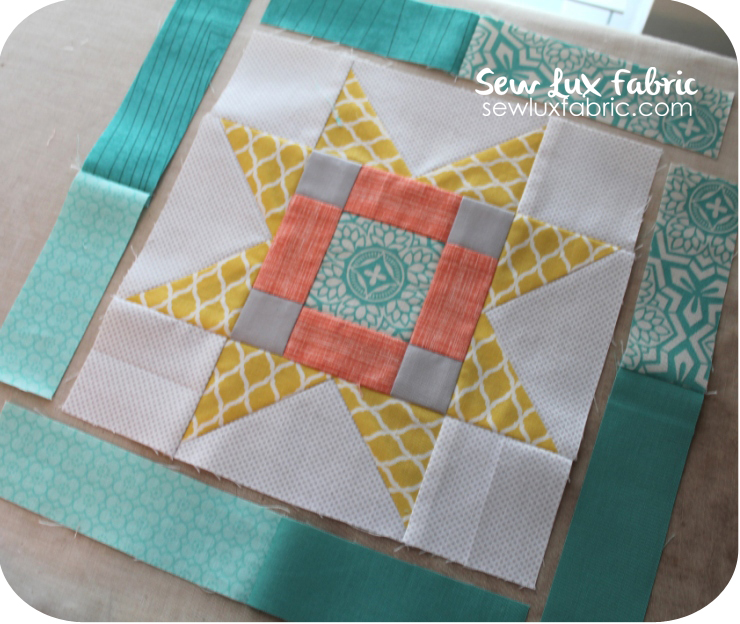
Arrange the teal pieces as shown with one 4.5″ and one 5.5″ strip on each side. We’ll be doing a partial seam in the corners for a little extra interest and to try a new technique. If you want to do two 4.5″ strips on the sides and then two 5.5″ strips on the top and bottom to make the border, go for it! I’ve included these steps in the downloadable pattern available at the end of this post.)
Sew each set of 4.5″ and 5.5″ strips together at the short ends.
Next, we’ll pin the strips in place with the short ends lined up with the edges of the center block as shown in the image below.
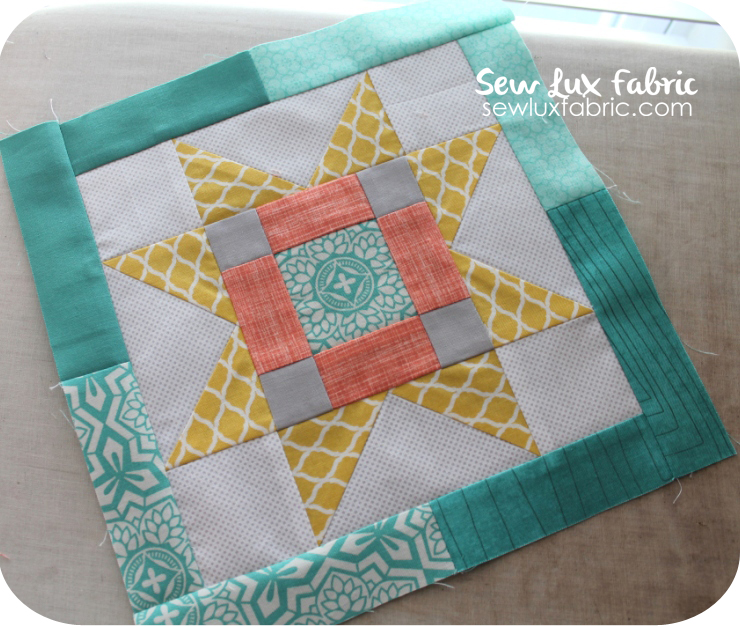
Sew using a 1/4″ seam from each corner stopping and backstitching from about 2″ from the end. Do this on all four sides. Then carefully press the seam and go back to finish attaching the strips. Press toward the teal strips.
Your block should now look like this.
Next up, let’s make some half square triangles. We need a total of 20. Using the background and peach 3″ squares, make a total of 20 HST blocks. (Some folks prefer to draw a line down the center of the background and sew 1/4″ on either side of the line, cut on the line and press to make their HST blocks. I just cut all my squares in half diagonally and go for it. Use your favorite method – there are loads of tutorials online!)
Be sure to trim all 20 HST blocks to 2.5″ square. I like to use a Bloc Loc ruler.
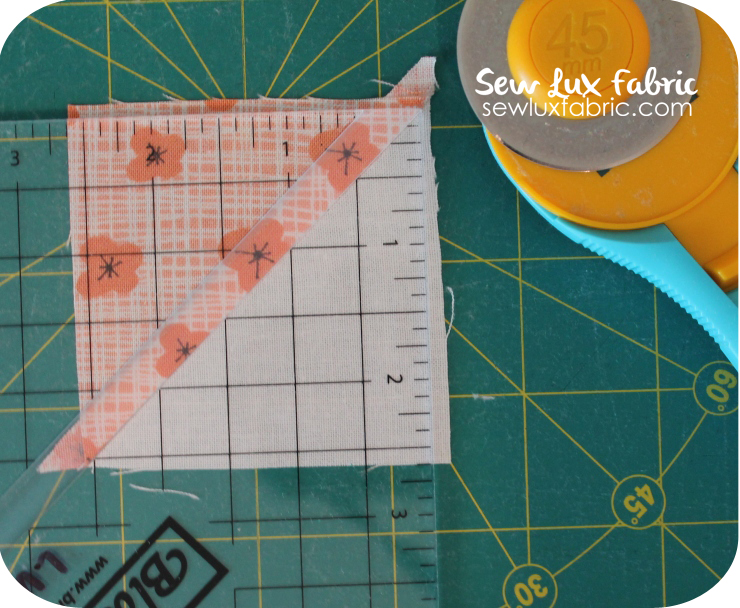
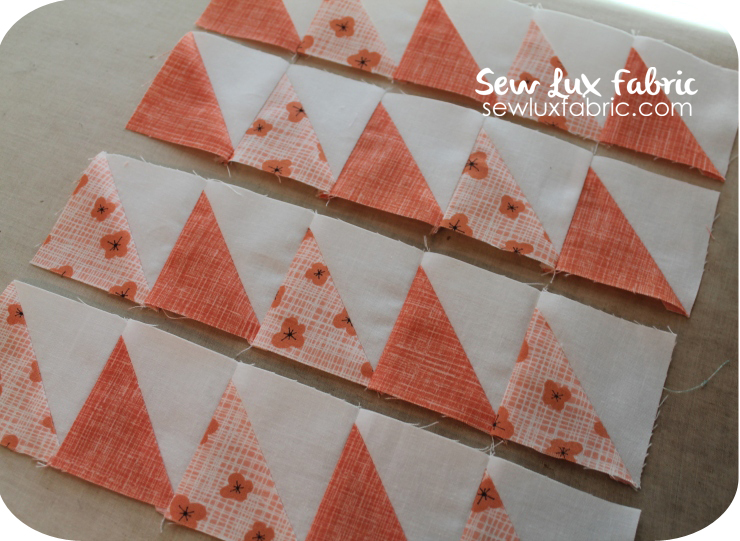
Next, sew four rows of five HST blocks. If you are using two different prints like I am, be sure to alternate them as shown. (Two rows have 3 flower print blocks and two rows have 3 solid print blocks.)
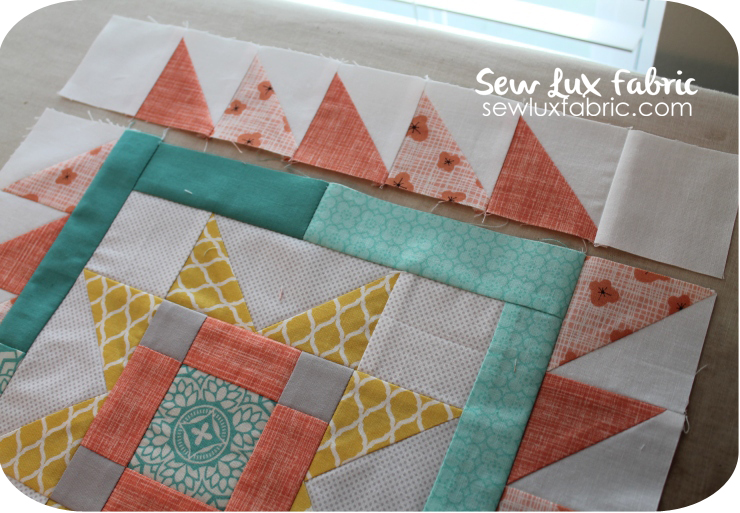
Sew one pair of rows to the top and bottom of your center. Press toward the center.
On the other pair of rows, sew one 2.5″ background square to each end of the row. Press toward the background.
Then, pin and sew these rows to the sides of the medallion center to complete this border. Press toward the center.
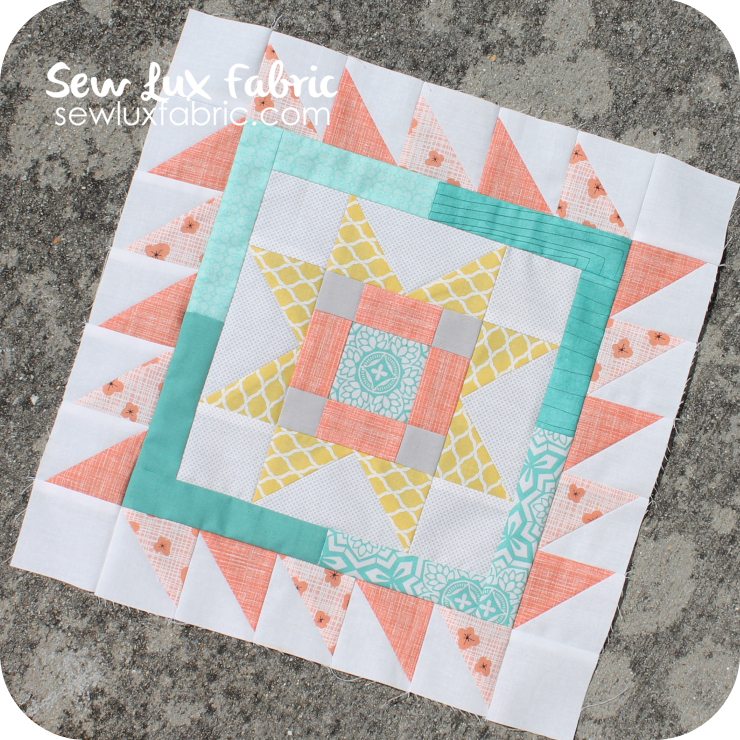
You’re all done!
Here’s a downloadable file for this month’s border pattern with step-by-step instructions.
I hope you enjoyed making this border with me! I can’t wait to sew with y’all again next month!
If you are sewing along and sharing on Instagram, tag us @cloverandviolet @cloverandviolet2 and @sewlux and use #minimedallionqal
Happy Sewing!
Chrissy




I’m so excited to go pick out the fabrics for the first border! Yay!! Thank you again for this charming quilt along!
Oh, I love this new border… I could not wait, so I went straight to my sewing machine with the new pattern! It turned out gorgeous and I like the original features. Can’t wait for next month…
love,
Ilse
I’ve made mine too. Fortunately it’s Sunday in New Zealand already, so I’ve had a quiet day and been able to sew the border. It’s a great pattern thank you.
So pretty!