Echinops & Aster – Embroidery with Piecing
Full details on sponsors and prizes here.
—–
 Today we’re welcoming Jenelle from Echinops & Aster. It has been fun to get to know Jenelle as she began her quilting journey, and, of course, to see all the beautiful touches of hand stitching and embroidery she adds to her work. She also has a pattern shop, with exquisite embroideries, you should check it out. I really love her owl, I just need to find time to stitch it up!
—–
Hi! I’m Jenelle and I share my projects and my love for all things fabric/thread related over at Echinops & Aster. I’m so excited to be posting here today and sharing a little bit of my hand stitched work with you! When Jennie and Clara asked me to guest post for a series they would be hosting that was all about hand stitching, I couldn’t say no. One of my favorite aspects of sewing is finding ways to incorporate hand work into the process.
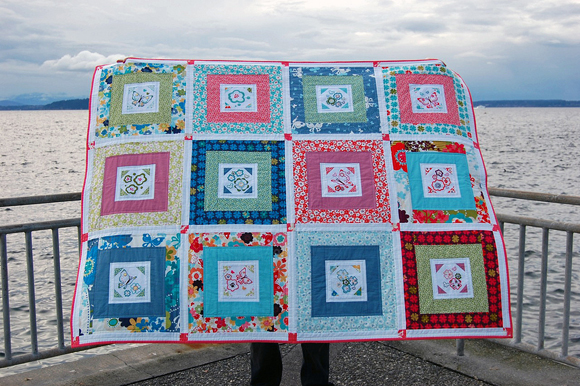
My first quilt really started this process for me. I actually made this quilt with Jennie and Clara during their Embroidery 101 Stitch Along in 2011. After finishing the top, with each of the embroidered blocks, I knew that I wanted to keep quilting and also start experimenting more with different ways to bring embroidery into my sewn projects.
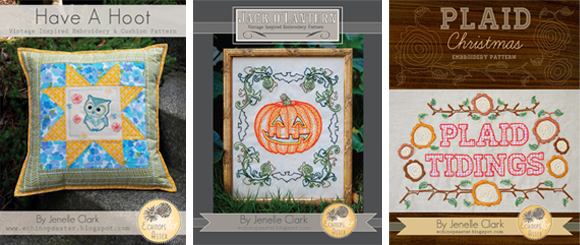
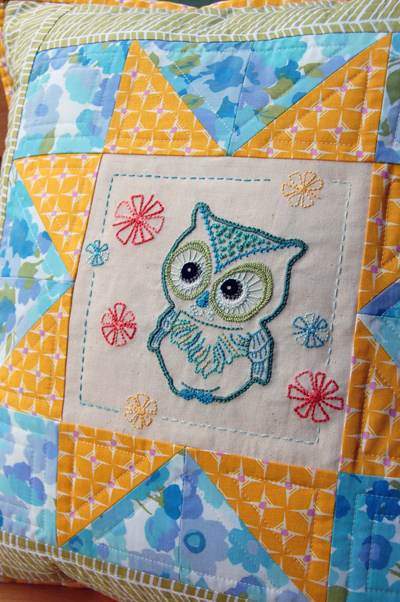
Fast forward a couple years later, and I’m now designing embroidery patterns. I often like to feature my designs next to traditional piecing in my machine sewn projects (like the owl pillow below).
I love to see how embroidery can help tie together fabrics, provide a focal point, and add a little extra texture and beauty to a project. It also lends a sort of instant “heirloom” quality to whatever you’re making, as the time and care that goes into hand work can really be read in each stitch.
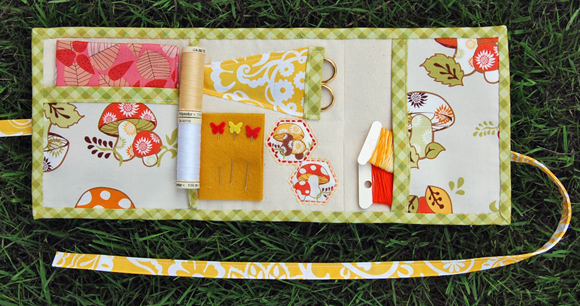
Another thing that I really love about hand sewing is the portability of it. My hand sewing kit gets a lot of mileage! I made mine using an excellent tutorial by Amy at Lots of Pink Here. Since I enjoy working with lots of different techniques–from English Paper Piecing to Embroidery to Applique–this kit, paired with a zipper pouch, is really all I need to take my work with me anywhere. I can swap in and out supplies and tools as needed, and everything stays-put (which is important when transporting needles and sharp pins!). 😉
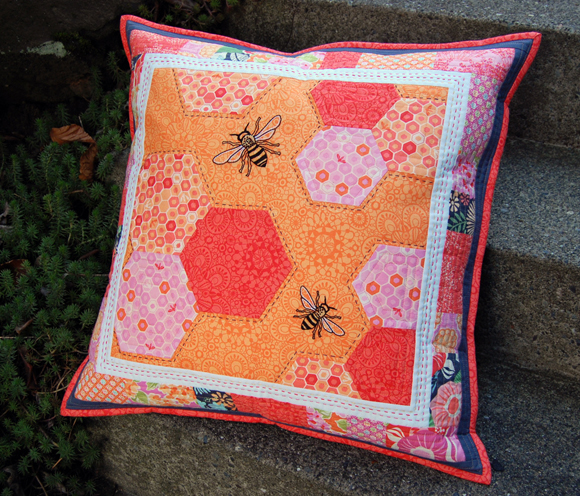
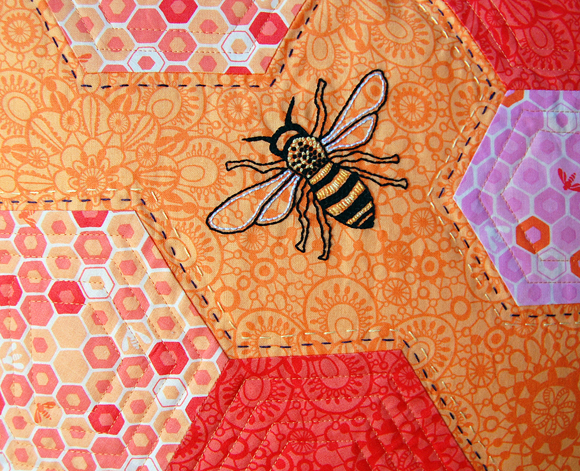
This past spring I decided to host my first stitch along and dedicate it to hand sewing. I designed a sampler, which I called the Honeycomb Pillow, using Kate Spain’s Honey, Honey collection as my inspiration. This project includes a whole host of hand sewing techniques, each of which are paired with tutorials and resources to help demonstrate and teach these fun sewing skills, even to a beginner.
I had a dedicated group of fantastic ladies who stitched along with me and it was awesome to see the projects coming together, each reflecting the personality and skill of the individual stitcher. I learned a lot in making my own pillow and felt extremely proud to also see others picking-up new skills and growing their sewing repertoire.
The Honeycomb Pillow pattern and each of the skill tutorials can be found here, on my blog, in case anyone is interested in exploring their own sampler pillow project. Thanks again to Jennie and Clara for inviting me over today and happy stitching!
I love your choice of colors. I also love incorporating embroidery in many things I make.
Your stitching is always perfect and I had no idea you had started to sell patterns – huge good luck with that! One day I shall make your pillow – perhaps it shall be a hand project to take to England next month 🙂
I love your Have a Hoot owl — he’s so cute! 🙂
I am a huge fan of Jenelle’s 🙂 I love her work and I followed along with her Honeycomb stitch along – the instructions were so easy to follow and the end result was a wonderful present for my sister-in-law who absolutely loves it. Thanks Jenelle!
I’ve always enjoyed watching your embroidery work pop on your blog. You are very talented! 🙂
Your work is amazing! The bees are wonderful.
Your owl is too sweet!:)
The honeycomb pillow is adorable. I so want to make this.
You do such fabulous work. I’m not a huge fan of owls but your owl and the way you stitched it, is really cute. I wanted to follow along with the Honeycomb Pillow but didn’t quite get that far though I saved your tutorials and still plan on completing it. Thanks for that excellent tut. I’ll be reading along with you; you are amazing!
I love embroidery too and your owl is soooo cute.
(smjohns63 at yahoo dot com)
I love combining embroidery and patchwork! Great job!!!
Plaid tidings. LOL. 🙂
your pillows and sewing kit is gorgeous.
It’s always a pleasure to look at your blog, you have wonderful ideas, the fabric’s choice the colors etc, thank you very much
sincerely
Michelle from Burgundy – France
I love your embroidered owl. He is beautiful. So is your honeycomb cushion.
love that owl pillow
You have mastered embroidery and it looks amazing with your quilted pieces – adds a special touch!! Thanks for sharing!
That honeycomb pillow is soo neat! I love the bee!
I love the bumble bee cushion – I may have to make one for myself.
I love your work Janelle! I followed along with your Honeycomb Pillow and can’t wait until I can made one. Thank you for sharing!!
This series has been so inspirational- thank you for hosting it! And I am so happy to see Janelle guest-posting today. I made the honeycomb pillow and it is awesome! People notice it right away at my house and comment on it. AND it inspired me to start embroidering again. 🙂
Beautiful! I love embroidery combined with patchwork and enjoyed seeing your lovely work in this post.
Helen x
Your work is amazing!! I am heading over to your blog right now!
I love the pillow design. I like the combo of embroidery, paper-pieced hexies, and applique. I want to make one!
Oh wow!! I am in love with hoot!! I may have an addiction problem with owls 😉 lol. Love embroidery mixed in with quilting and epp!
such beautiful work. I’m completely with you in your love of embroidery
Thank you for sharing your sentiments on combining stitchery, EPP, and quilting to create an heirloom treasure. I agree, just never put it into words.!!! Your patterns are the cutest, will definitely be trying Give a Hoot pillow <3.
Beautiful stitching! I love to embroider too.
Love all of her stitching! I joined her Honeycomb Pillow SAL and she had such great tutorials.
Fabulous post and I love the quilt!
A good sewing machine dealer will be happy to let you try different machines and will show you how they work. You should sit down and play with them until you have a good feel for the machine.