Charm Madness – Charming Patchwork Lunch Bag {Tutorial}
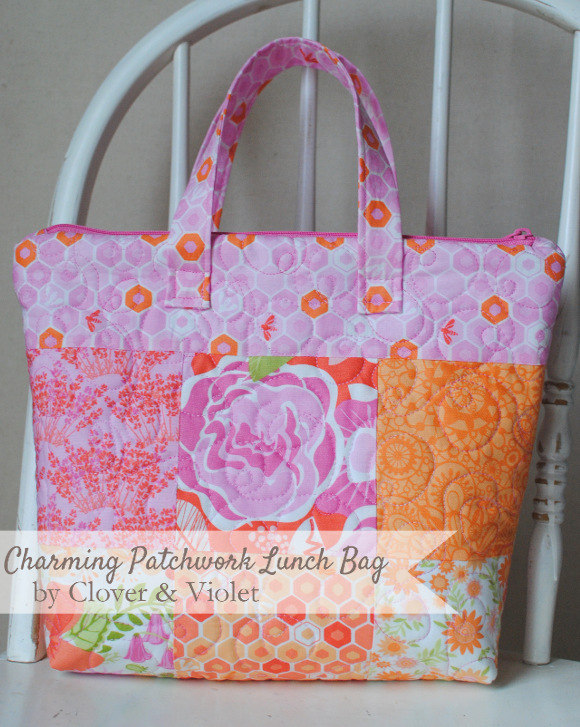
Today I’m sharing a tutorial for a lunch bag that I originally made with some Half Moon Modern charms {see the original here}. Today’s version uses Honey, Honey by Kate Spain for Moda, which is just beautiful, if you ask me! The lunch bag measures 13 1/2″ tall and 14 1/2″ wide. It easily holds a sandwich box, thermos, and has a little extra room too. Insulated with Pellon® Insul-Fleece 975 and lined with Pellon® Lamifix® 875, so it can easily be wiped clean {I just used cotton in the original bag, only to have an almost empty yogurt pouch leak in it!}.
Sew Lux Fabric & Gifts {shop & blog} is also offering fabric kits at a discount, find them here.
Let’s get started. You will need:
- 1 charm pack
- 1 fat quarter {accent and handles}
- 1/2 yard {lining}
- 1/2 yard Pellon® Insul-Fleece 975
- 1/2 yard Pellon® Fusible Fleece 987F
- 1 yard Pellon® Lamifix 875 {15″ wide}
- 3/8 yard Pellon® Fusible Midweight 931TD
- 14″ purse zipper
Note: all seam allowances are 1/4″ unless otherwise stated. According to the Lamifix® directions, it is to be used on prewashed fabric, therefore, I prewashed my lining fat quarter in cold water and tumbled dry without a fabric softener sheet. I did not prewash the other fat quarter or the charm squares. I also used a 40wt thread instead of my standard 50wt. I do recommend getting a sturdy needle (90/14) and some slightly weightier thread because this project has a lot of thick layers.
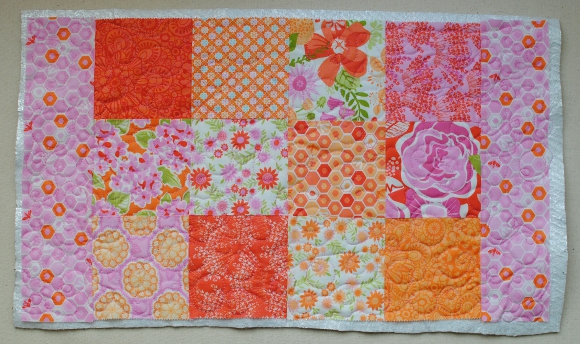
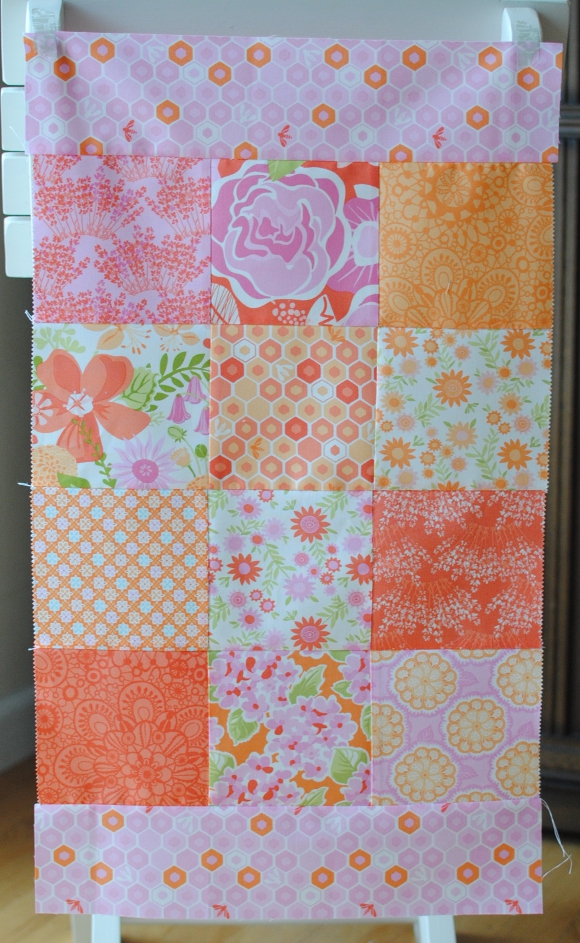
1. Choose 12 charm squares for the body of the bag. Arrange and sew together four rows of three. Then sew the rows together. From the outside fat quarter cut 2 – 3 1/2″ x 14 1/4″ rectangles. Sew to the top and bottom {along the rows of 3}.
3. From the lining half yard cut two 14″ x 12 1/2″ {you will note this is slightly narrower than the body of the bag, because of the Insul-Fleece, the inside pieces are cut slightly smaller}. Fuse the Lamifix to the right side of the fabric by placing the dull side against the fabric and pressing from the wrong side of the fabric.
4. Fuse one 14″ x 12 1/2″ rectangle of fusible fleece to the wrong side of the lining panel. Make sure to use a press cloth so that neither the Fusible Fleece or the Lamifix comes in contact with the hot iron, or they will melt.
5. Repeat for second lining piece.
Note: if this is your first zipper pouch, please refer to the Basic Zipper Pouch Tutorial for detailed instructions.
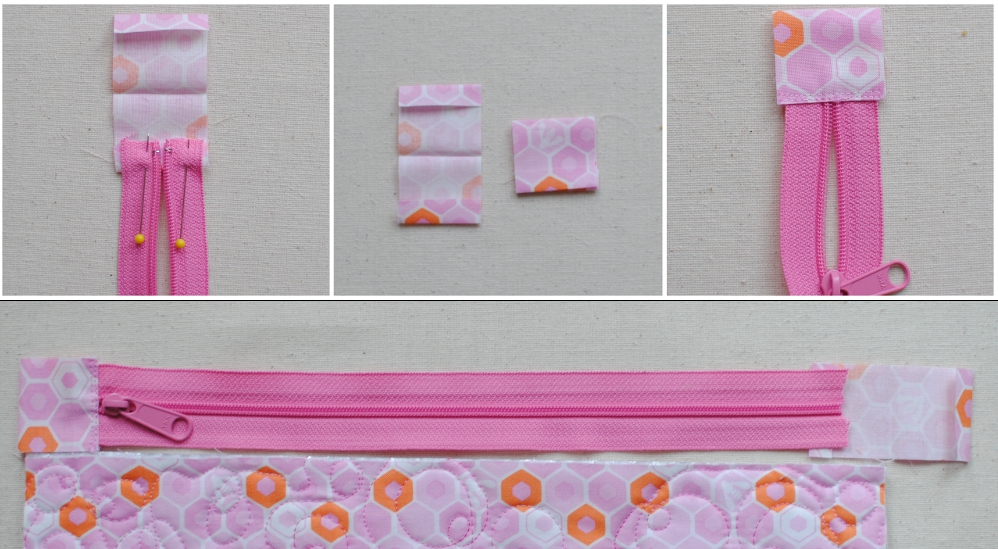
6. Cut two 3 1/2″ x 1 1/2″ rectangles and sew into zipper tabs., back stitching to secure the zipper teeth in place. Make sure the ends of the zipper do not extend to the ends of the tabs, when sewing the size seams you should not sew over the zipper teeth.
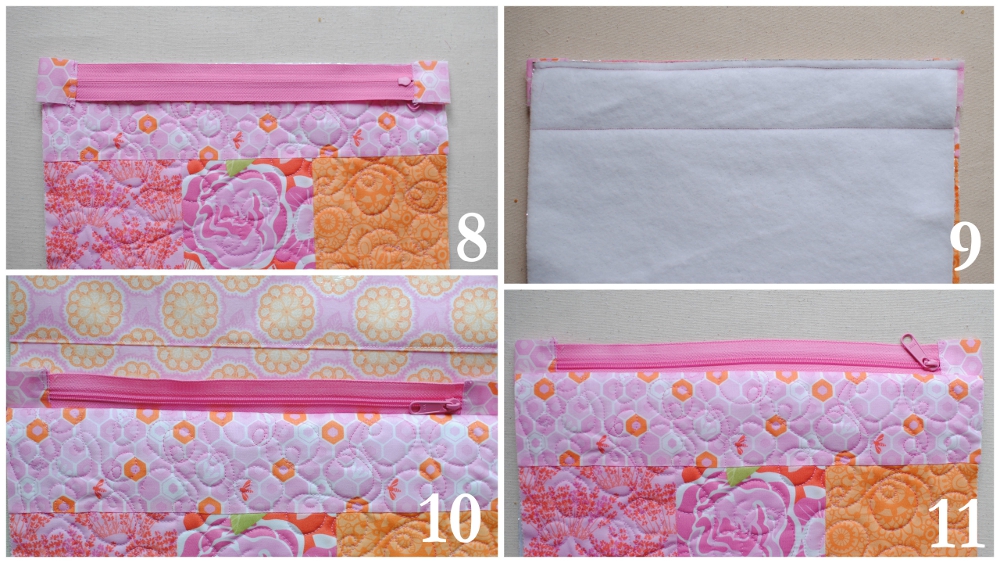
7. Place the lining on top of the zipper, right side toward the right side of the bag outer and stitch along edge.
8. Open along the seam to reveal zipper.
9. Fold the lining wrong sides together with the patchwork bag outer.
11. Repeat with other end of bag and other lining piece.
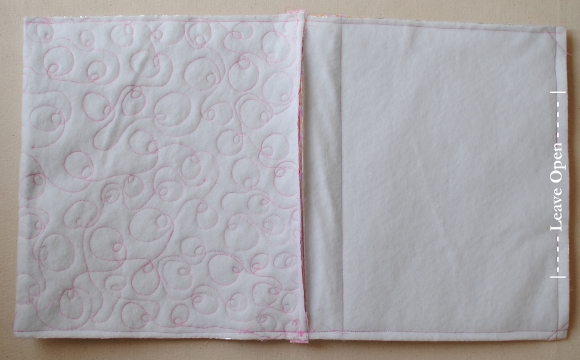
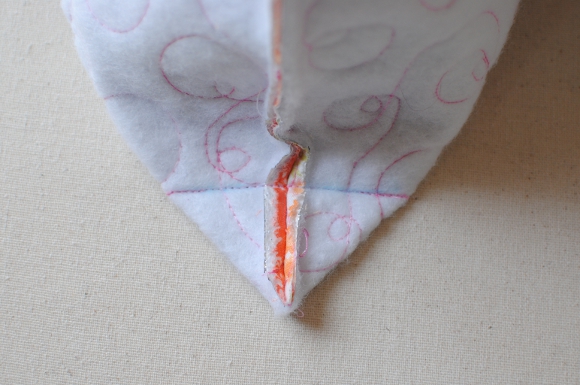

14. Trim the side of the fabric near the zipper {not shown, I forgot! See details here.}.
15. Gently turn bag right side out through opening. Use a press cloth to re-iron Lamifix near edge if it peeled away during turning, mine did a little bit.

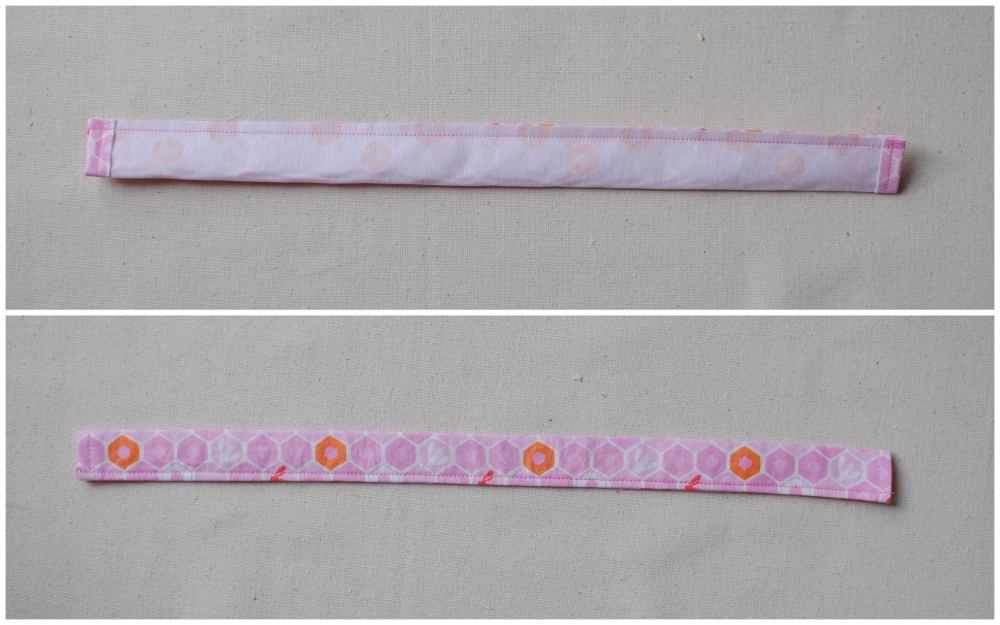
17. Cut 2 – 2 1/2″ x 17″ strips from outside fat quarter. Fuse a 2 1/2″ x 17″ strip of Fusible Midweight to the wrong side of each handle. Finish the ends by folding 3/8″ of the raw edge to the wrong side and top stitching in place. Fold the handle right sides together longways and sew 1/4″ from long edge. Turn right side out, press, and top stitch 1/8″ from seam on long edge.
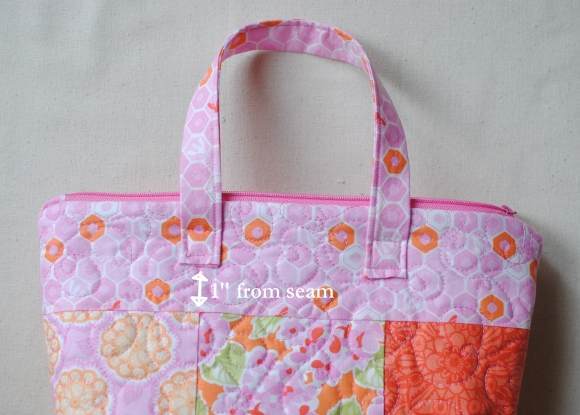
19. Repeat for the remaining three handles and you’re done!
Enjoy your lunch bag! And enjoy the rest of the Charm Madness Blog Hop, there is sure to be some great charm pack inspiration! Thanks so much to Sew Lux Fabric & Gifts {shop & blog} for organizing
If you make one of these bags, we’d love for you to add it to the Flickr group or send us an e-mail!


Oh I just love the lunch bag and the charm squares you used so bright and cheerful. And to tell you the truth it is perfect timing. My DIL went back to work just yesterday and needs to have one of these so now I just need to find the perfect charm pack. Thanks again.
I have wanted to make a lunch bag and I just love this one!! Thanks for sharing this project!!
Thanks for the great tutorial.
It’s gorgeous!! I just wish I could find those extra interfacings, etc easily here 🙁 Do you know anywhere online that sells them?
Gorgeous lunch bag and a wonderful tutorial! I love buying charm packs too…and these look so pretty, bright and colourful!
Helen x
Thank you for a lovely tutorial! This bag is so adorable! What a great way to use some charm squares!!
This is my first time here, jumped over from the announcement of the Charm Blog Hop. I am a “charmed girl”…besides a charming family, a charming life and charming puppies – I HEART charms!! I should be ashamed at how many charm packs I have but I’m not. LOL. Charming lunch bag!! Thank you so much for an easy-to-follow tutorial. Hugs
such a great bag and I desperately need a new one, mine is gross! Off to a craft show this weekend so will keep an eye out for a charm pack and matching fqs!
This is wonderful and looks so easy to do.
Thanks for such a grat tutorial.
This is so pretty! I love the Lamifix – what a great way to protect fabric and make it wipe-able. I am going have to find some and try it. I have been wanting to make some lunch bags, but was concerned about keeping the inside clean! XOXO
Thanks for the wonderful tutorial!
Your charm bag is so pretty. Thanks for the tutorial!
Hm, I think I might have to look into these charm packs. I have never used one or heard of them til I started reading your blog, but it looks like a good way to get a variety of really pretty fabric. And I guess it goes without saying, although I am saying, that the bag is really cute!
What a wonderful project! I love this collection by Kate Sprain; doesn’t it just say spring! The idea to use laminated fabric for the interior is perfect. Thanks for the tut.
Thanks for the tutorial!! Cute bag!
I love the scotties on your blog title. I have one scottie pup and possibly next month I’ll get another!
What a cute bag! Maybe I need to finally unpack that new sewing machine….
great bag and tutorial. I really like the idea of the zipper on it.
The bag looks great! I love the fabric too.
So nice of you to share this pattern with us! I have a lunch bag that I bought at Whole Foods and it’s very similar to this one. I’ve been wanting to “recreate” it and now I don’t have to do the math!
This is beautiful..and the colors are lovely! Thanks for sharing the tutorial.
Didn’t realize how simple it is making your own lunch bag. . Do you think you can find some of these items at a local craft store?
I will be making one of these for sure. For my daughter. It’s not wide enough for me to use; I carry a million containers with me. But for rides in the car for her to have her snacks handy… YUP! Digging into my charm stash this weekend.
What a great project! I have been wondering how to use up some of these charm packs that I have and now I have an answer. Thank you!
Very cute! One would be quite stylish carrying that lunch tote.
So cute! Thank you for a great tutorial and love that you have nice photos as well. I love charm packs and I’m so excited about this hop. Thanks for sharing, great job!
usairdoll(at)gmail(dot)com
This is so cute! Great idea- I take my lunch alot and can’t wait to try this!
Very cute lunch bag. Love that you used the Lamifix. I’m dying to try it.
I love this bag! We are posting the tutorial on our FB page – Lola Pink Fabrics.
I loved your tutorial so much, I made one for myself. http://ladybugln.blogspot.com/2013/05/charming-patchwork-lunch-bag.html
Very Nice bag and tutorial!
Thank you for this tutorial, very nice bag dan I try to make it because Ilove sewing and making handcraft. Thank you so much.
I have read so many posdts on the topic of the blogger lovers however this article is genuinely a nicce piece of writing, keep it
up.