Tips & Tricks :: Marking
This contributor post is by Sandie of crazy’boutquilts.
Hello everyone! It’s me, Sandie from crazy’boutquilts back with a few more tips and tricks for you. Today I want to talk about marking. There are a bunch of products on the market when it comes to marking your projects. I can honestly say, I haven’t tried most of them. Like most of you, I don’t have an unlimited budget for sewing and quilting, so I go with my tried and true methods. They work, so why not save those extra dollars for fabric?
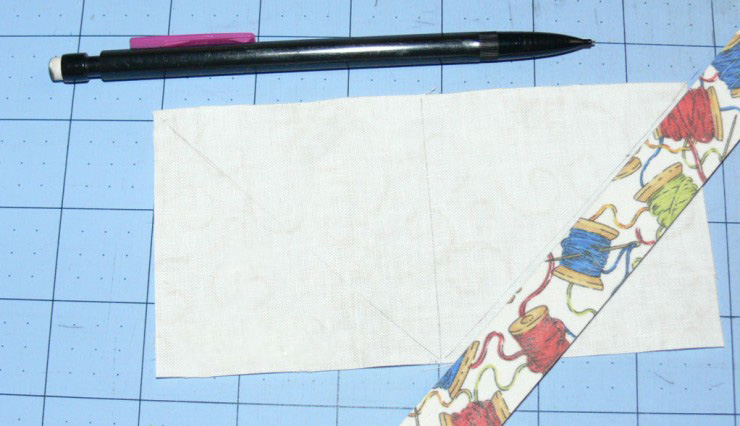
First on my list is my mechanical pencil. I use it all the time! Most of my marks are on the back of the fabric, like marking cutting lines when making half square triangles in quilting. I use a large nail file as my ‘ruler’ because it has enough grit to hold the fabric nicely so the corners don’t move.
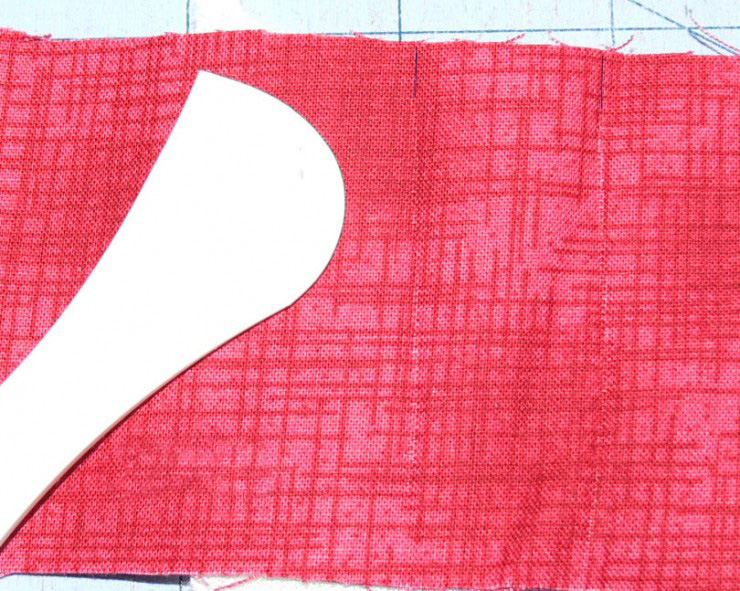
Next on my list is a Hera marker. A long time ago they were made from bone and used by tailors. Mine is plastic, but works the same way. If I am doing machine quilting on a small piece and need to mark a sewing line~ the Hera works great! And there is no need to remove the lines, as they are just little grooves in the fabric. I know they are hard to see in this photo, so I marked some black lines at the top. Under the sewing machine foot, the light hits them just right and they are quite easy to follow.
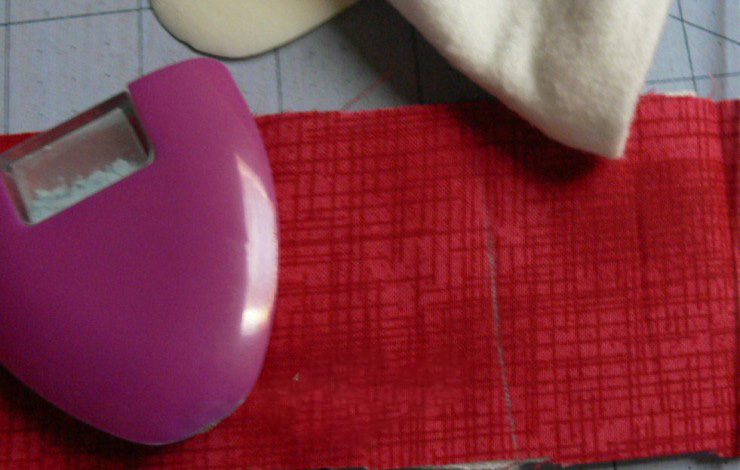
I used chalk a lot too. This little wheeled marker makes a very fine line. I can easily see it on darker fabrics, and it brushes away with a small piece of flannel or even batting. This is especially nice when you don’t want to have to wash the item you are sewing before using it.
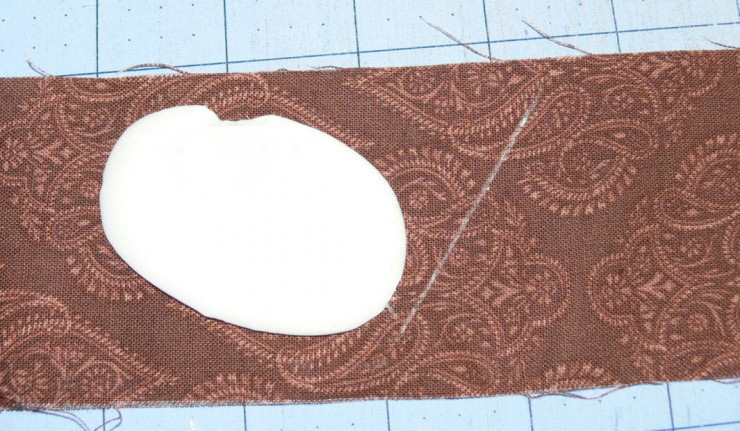
Finally, my Grandmom always used soap slivers and they have a place in my tools too. Mine are from a bar of Ivory soap. The line doesn’t brush away, so if your project is being moved around a lot there is no worry. I spot remove them with a damp flannel scrap if they don’t disappear under the stitching. I usually use these when I know I will be washing the project as soon as I finish it.
Now I know there are a lot of disappearing ink pens and things on the market. There is nothing wrong with them that I know, I even tried one at one time. But the ink dried out before I used it very much, so I stopped and went back to my old methods. It all depends on how often you use them, I guess. I hope you’ve found some of my tips useful.
Thanks to Jennie and Clara for allowing me to visit with y’all today! Have a happy day!

Great tips. Love the nail file trick definitely using that with the next stack of HST. Tried using the erasable pen but was leaving globs of ink as it went. I’m a huge mechanical pencil user (2B lead favorite) so right up my alley.
Thank you for this reminder. Too often I find that I want the latest gadget thinking that it will make my quilting better! Often this is just a waste of money. Clover makes chalk markers that roll over the fabric and are very nice. HOWEVER, when I used the blue one, it would not disappear from my fabric. I also used the edge of my shirt to try to erase it (it’s erasable chalk, right?) and had to treat the stain that only came out after repeated washings.
Thank you Sandie! I remember my mom using a soap piece. What a great reminder! On occasion I too try out new tools and gadgets, but often find ‘simple’ is best.
The nail file is a really good idea – thanks for all these tips 🙂
Nail file is a genius idea! Thanks for sharing!!!
I like the nail file tip as well, thanks
Love the nail file idea!! Thanks for a great tip ya’ll!!
All great ideas. I had forgotten about the soap idea. I’ll have to add that to my arsenal of marking tools!!!
These are my favorite’s too! I agree save your money for the best fabric you can buy! Such a better investment! Too much time is spent worry about what will wash out or not when you can just use these simple tools.