French Seams & Book Bag {Tutorial}
 Welcome to the first Sewing 101 post! While we had originally planned to have a schedule for specific types of sewing tips and know how, it looks more like we will be coordinating the sewing lessons with simple projects that use them. So, I thought I’d kick it off with a closer look at French Seams.
French seams are a simple way to finish a seam without a raw edge. French seams are great for lightweight fabric that might fray easily, or for simple projects that will not have any sort of lining. So, let’s get started!
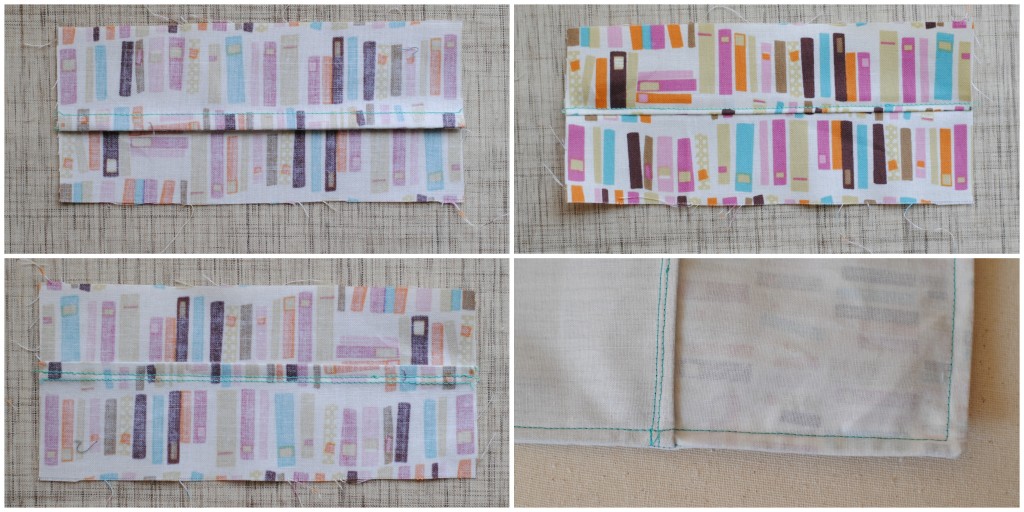
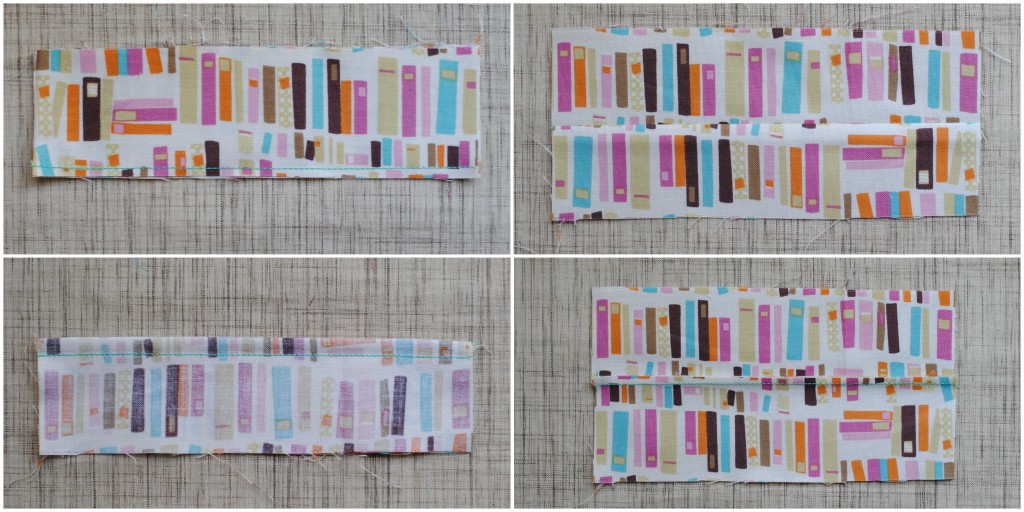 First, place your fabrics wrong sides together, then sew a seam allowance. If you’re sewing with regular cotton, sew a 1/8″ seam allowance, otherwise, sew 1/4″ and then trim to 1/8″. Press the seam to one side and then fold the fabric right sides together. Stitch a 1/4″ seam allowance and the raw edge will sealed inside the seam! If you click on the image it will enlarge so you can see the detail.
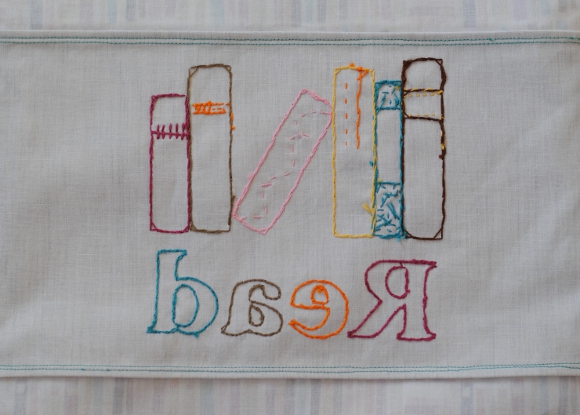
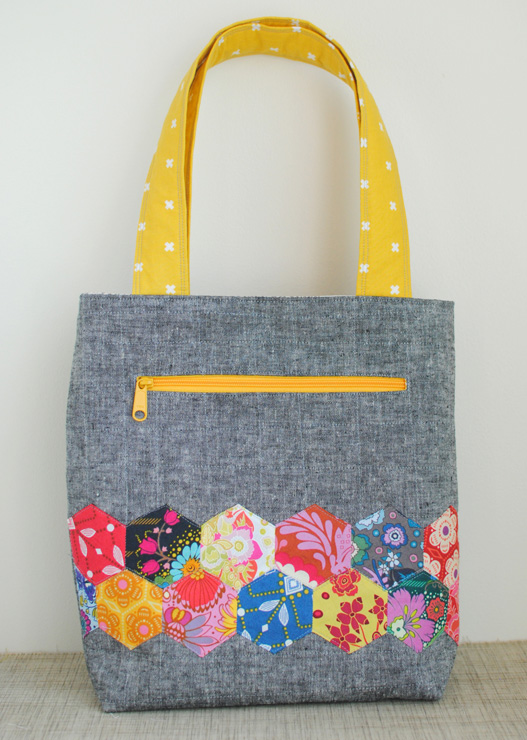
Here’s a look at the inside of a french seam. I’ve also taken an extra step to top stitch the seam, which is useful using a french seam for a flat piece {like the embroidered “books” panel on the book bag}. You can see an example of the flat, top stitched seam and the corner seams on the final image in the above collage.
Now, onto the book bag! You will need the following pieces:
From main print cut one each {I used regular quilting weight cotton backed with Pellon SF-101 woven interfacing, this is a great option for making a lighter cotton more sturdy, while still maintaining the look of fabric on the wrong side}:
- 6 1/2″ x 14″ for above embroidery
- 5″ x 14″ for below embroidery
- 17″ x 14″ back of bag
From embroidery fabric {I used Moda Cross Weave in Natural, and backed all pieces with the SF-101 as above}:
- 8″ x 14″ for books
- 2 – 13 1/2″ x 3″ for handles
Download the free embroidery pattern here!
I stitched my embroidery using the following Finca Perle Cotton colors:
- Brown 8080
- Lt. Brown 8327
- Purple 2246
- Pink 1729
- Blue 3664
- Yellow 1062
Then, assemble the embroidery panel and top and bottom prints using top stitched french seams.
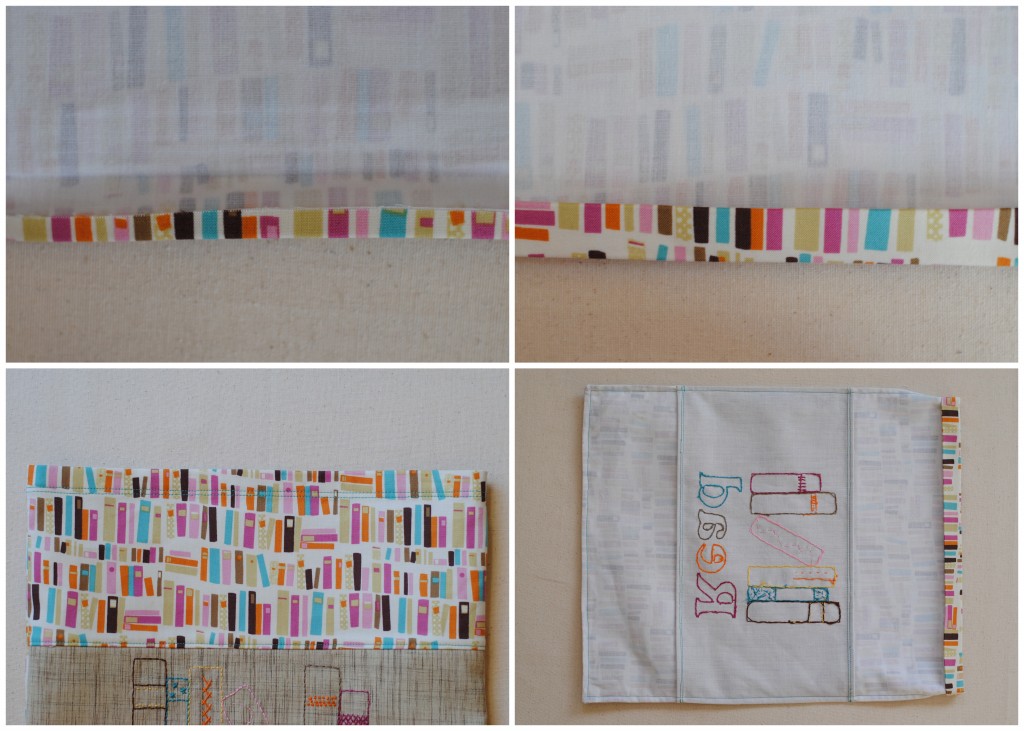 Before sewing the front and back together, fold the top edge down 1/4″ and then 1″ and iron {I used a little Best Press to make nice creases}. Then, using the french seam method, sew the sides and bottom of the bag first right sides together, then wrong sides together. Then, fold the hem down.
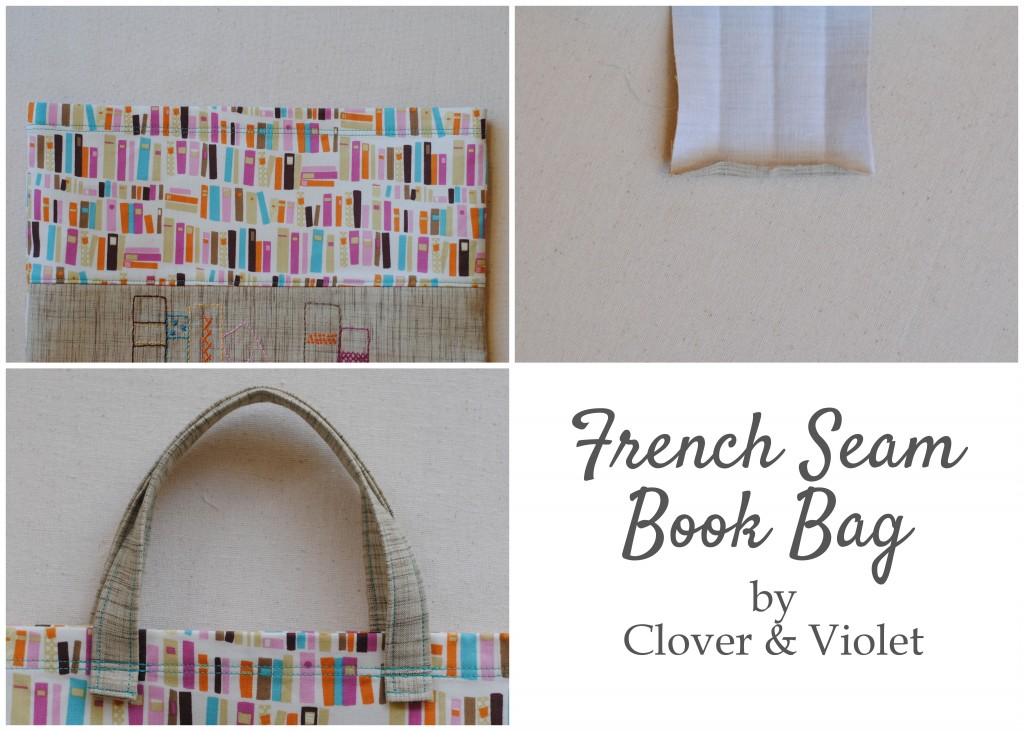 Sew a double row of stitching around the top hem. Then, fold under 1/2″ of each end of the handle, then fold as for double fold bias tape. Stitch along edges. Then, secure to bag along hem seam lines. And your book bag is finished!
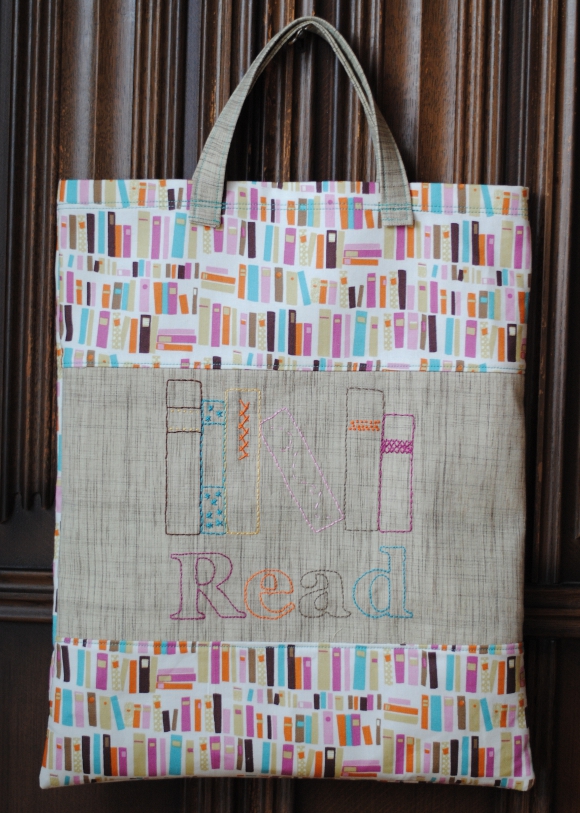 I think this would make a great gift for any reader {or it could easily serve as a reusable grocery or market bag too!}. If you make one, we’d love to see it. Please e-mail us at office {at} cloverandviolet.com or add it to our Flickr group.

I love to finish my seams this way. They lay beautifully and are finished looking. Thank you for the wonderful tutorial…smiles…Renee
Jennie, maybe check your words I think first wrong sides together then right sides together, at least that is how I do them and matches your photos I think.
Yikes, thanks for noticing Leanne! It’s all fixed now!
Thanks for the tutorial on seams! It’s wonderful. The book bag is really cute too!
Thanks for a great tutorial! I love this bag! Quick question…where is this fabric from? I love love LOVE it! 🙂
Well done!
Your first tutorial is fabulous like your minds! It is simple and easy to learn. I’ll have my wife read your blog so she could have a new hobby at home.
Ed of FashionPatterns.com
Such a good, clear tutorial! I love french seams they look so neat and tidy 🙂
Wishing you a wonderful weekend.
Helen x
Very, very cute!!
Great tutorial! I think French seams are such a nice way to finish a sewn project. We often think of them in garment sewing, but they work equally well here too!