Easter Bunny Blog Hop – Quilted Easter Basket Lunch Bag
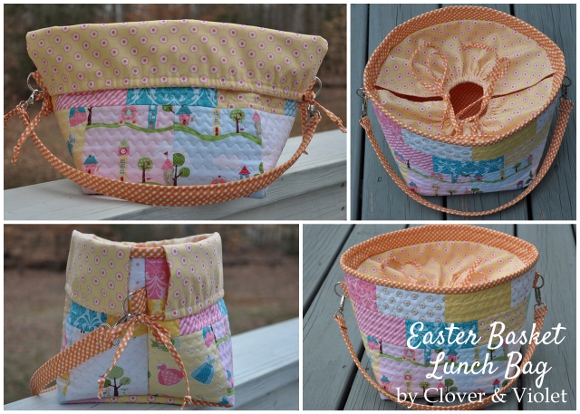
So glad you are here for our project, you can see the other projects by going to Lilac Lane, we are excited to share our Convertible Easter Basket/ Lunchbag with you!
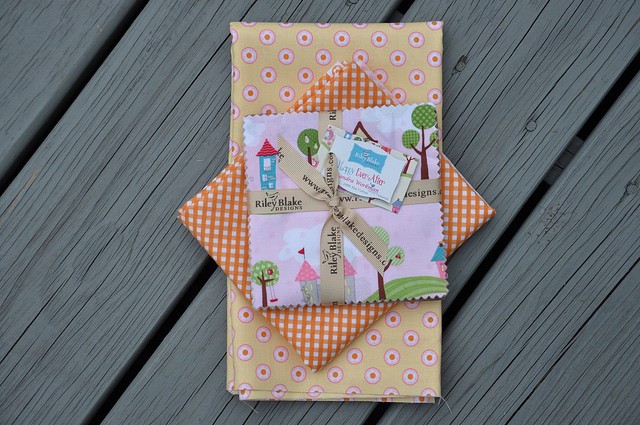
For our project we used an adorable stack of 5″ squares of Happy Ever After designed by Sandra Workman for Riley Blake. They are so cute and perfect for this project. We also purchased some coordinating fabric from the same line to make a basket/lunch bag.
You will need:
- 20- 5″ squares
- 1 yard fabric for lining, handle, and ties
- 1/2 yard fabric for bottom piece and lining/ casing band
- Insulated fabric heat/cold 25 1/4″ x 18 1/2″ for main part of basket
- Interfacing 1 yard for lining and handle
- Flannel 2 1/2″ x WOF for handle
- 2 -1″ D-Rings
- 2 – 2″ Swivel Clips
Note: WOF = Width of Fabric, all seam allowances are 1/4″ unless otherwise stated.
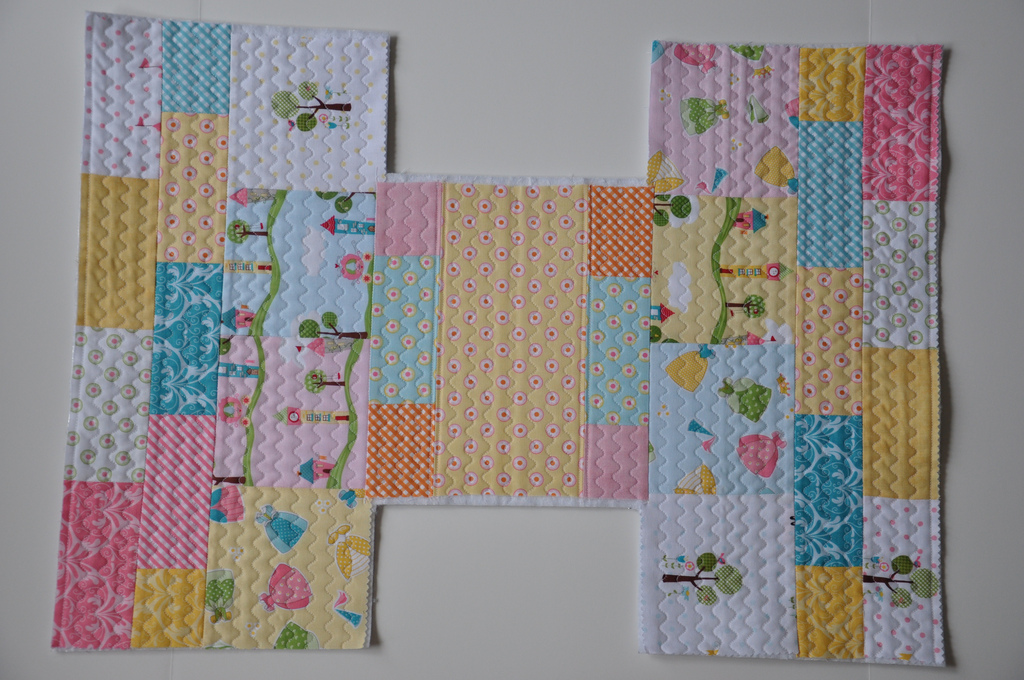
Arrange the squares into rows to make three sections, cutting some of the squares in half to make subway pieces. Sew them using 1/4″ seam allowances. Press seams open.
You will need to cut one 5″ x 9 1/2″ of coordinating fabric for the bottom middle section, this will be joined with half squares.
Sew the three sections together.
Place patchwork piece on insulated fabric and quilt as desired. I used a walking foot to do the quilting. This made such a difference, the foot simply glided over the fabric!!
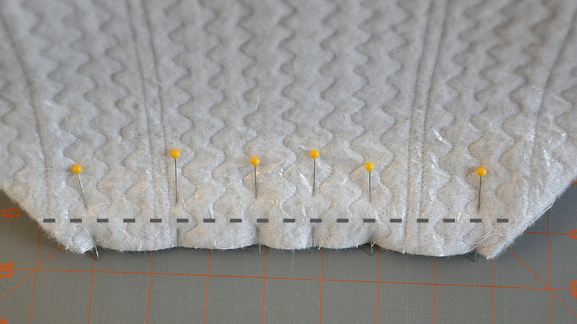
Trim the quilted piece, cutting away the excess on the bottom.
Use the lining fabric to cut out the same shape as the quilted piece of the basket, cut the lining 1 1/2″ shorter on what will be the top of the basket on front and back. Cut the interfacing the same size as the lining and fuse to the wrong side of lining, this will make your basket nice and sturdy.
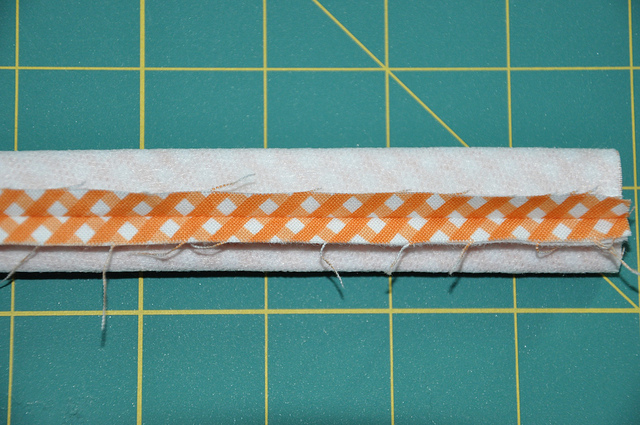
To make the handle and loops cut 1- 2 3/4″ x WOF piece. You will iron the interfacing to the wrong side of strip for handle and loops. Sew using 1/4 ” seam allowance along long side with wrong sides together. Press seam allowance open, then turn using any method you choose. I used a safety pin and pulled the end through until it was right side out. Press with the seam in the middle.
For loops: Cut 1 -6″ section from the end of the handle piece. These will be the loops for the D-Rings. Top stitch 1/4″ along edge on both sides then cut into 2 – 3″ sections.
For handle: Insert flannel into long tube using a safety-pin, press flat with seam along the center, top stitch 1/4″ along edge on both sides. Fold the end of the handle twice inserting the Swivel Clip and stitch. Handle is 24″ long.
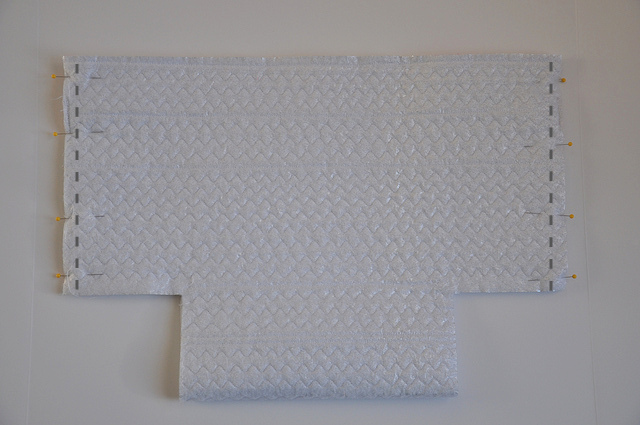
Insert a D-Ring into loop and sandwich in the side seams of the basket 1 1/2″ from the top. Sew the side seams with a 1/2″ seam allowance. Press the seams open.
Sew the bottom corners of the basket using a 1/2″ seam allowance.
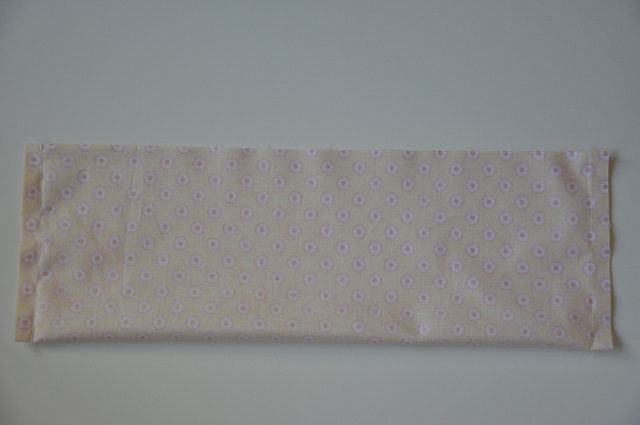
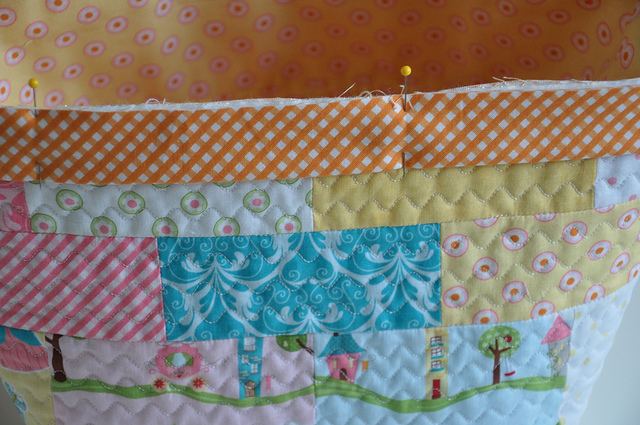
Cut 2 pieces of coordinating fabric 17 1/2″ x 12″. Sew them together as pictured using 1/2″ seam allowance. Trim the corners and turn and press. On folded edge turn 1/2″ and press. Sew along folded edge this will create a casing for your drawstrings on the basket liner.
Cut 2 pieces of fabric 2″ x 18 1/2″ using lining fabric for the top piece of lining.
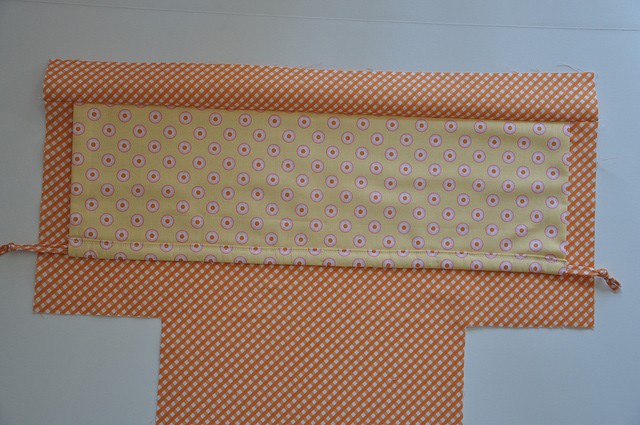
Layer lining, drawstring piece and final top piece on both ends of lining, sew them using 1/4″ seam allowance. Do this on both top and bottom of lining. Press seams down and topstitch if desired just under casing piece.
Make drawstrings using 2- 1 1/4″ x WOF. Using bias maker or by folding towards center and ironing, then fold in half and press. Feed through casing and cut to desired length, tie a knot in the ends.
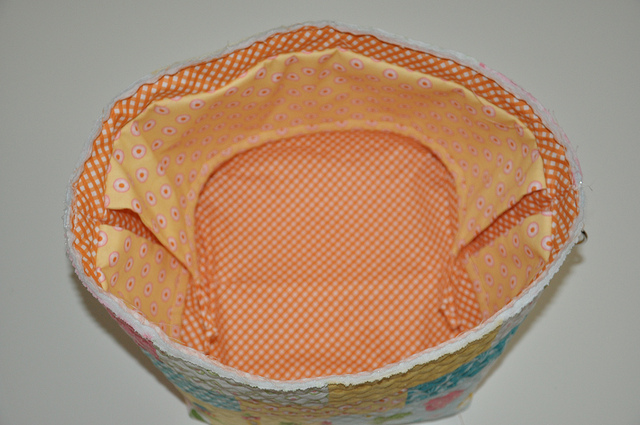
Sew the sides and corners of lining using 1/2″ seam allowance place into basket, stitch down outside basket side seams to secure lining to the outside of basket. Sew around the top of the basket securing the lining to the basket.
Cut 1- 2 1/2″ x WOF for binding, fold in half with wrong sides together and press, sew along top edge of basket and finish the same as you would for a quilt.
Now you are ready to fill your basket with loads of goodies for Easter or pack it with a lunch for a picnic. We made sure it was large enough (9″ x 9″ square and 9″ tall) to enjoy and have many uses. You can also remove the handle and use it for a basket on a dresser or table.
For our giveaway we have a stack of 5″ squares of Happy Ever After and some extra fabric to get you started on your own basket/ lunch bag or anything you would like to make. Just leave us a comment on this post and we will draw a winner at the end of the blog hop.
This giveaway is now closed.
Thank you for visiting and we hope you enjoy the other projects!!




That is just the cutest little lunch bag. I think I need to make that. Thanks for the chance to win the fabric.
What an adorable lunch bag! I live the fabrics and the way it is quilted! Thanks for the chance to win the fabric!
this is such a cute project
What a nice project! Thank you for the tutorial and giveaway!
I love this! Not like anything I’ve seen before, and totally adorable! Thanks for sharing and for the chance to win.
Both are adorable! Basket and fabrics to win, too Thank you for a tutorial and for a chance to win.
That is so cute! Think I’m going to have to make one of these
What a lovley tutorial! Thanks for sharing and for a nice giveaway!
this is adorable! adding it to my must make list! Thanks
Wow That is just adorable. My granddaughter will love it. She is just learning how to sew and we have sew dates. Can’t wait to try this with her. Might be a bit complicated for her but I’ll let her sew the seams.
Gotta start somewhere right.!!!!
Your Easter Basket Lunch Bag is way to cute. Will come in handy for those eggs or even for a picnic. Thank you for sharing this cute pattern and hoping to win some fabric for me to make that lunch bag. I am looking forward to a picnic now.
Sandi Timmons
sandit1@sbcglobal.net
This is about the cutest thing ever!! Thanks for the tutorial!!
Extremely cute, thanks for sharing.
This is just adorable! Thank you for sharing the tutorial.
Lovely basket, thank you for sharing. I always like a good tutorial with lots of clear photos to help.
This is so cute. I am always looking for new lunch bag options, though I often end up with just a plastic bag! This would be much more charming and make me want to eat my healthy, homemade lunches, I’m sure! Thanks!
That is the most adorable bag/basket. Thank you so much for the tutorial!!
Love this pattern and basket ! So very cute ! Would love to try to make it soon !
Love it! Thanks for sharing!
This is so cute, thanks for the tutorial. This looks like it would be a vun project for the great neices and nephews.
Wow! Thanks for the tute! I was looking to make cute baskets for the kids this year!
Wow that’s so cute!
What a great project! Thank you!
Great giveaway too – count me in please!
This is so cute! My friend’s little girl would love this and I would love making it for her
This is just too adorable! I wish I had time to make one before leaving for Texas on Friday!!
cute fabric and a great tutorial, thanks for the chance to make one of my own with Happy Ever After.
This is adorable!!! I may have to find some time to make a few of these before Easter
I have two new grandkids that would love this basket! I can think of numerous ways to use it around the house, not just for Easter. I LOVE the fabric! Thanks for the tutorial and the chance to win some of the fabric. Snowing here in VA today, a good day to quilt.
Thanks for the chance to win such beautiful fabric. I love your lunch bag, but since I have retired I think I would use it to carry my quilting supplies when we travel!
Thanks again!
How fun, I love this! Thanks for the tutorial!
How totally adorable! You are just too talented! Thanks so much for sharing this. I’ve definately marked this for my “to do” list
You always make the cutest projects and this is one of them! I love the versatility of it. Thank you for sharing!
Just too darn cute! I need to make one of these for our granddaughter! She would love it! XOXO
Too cute!!!! Will add to my to do list:)
A very cute and usable project.
This little project is so sweet . Love it ! Thank you for sharing and also for the generous giveaway.
Wow, what a great tutorial. I love the basket and the quilting you used. Would love that darling fabric too!
I will have to try making this bag love it and the fabric. lisursino@msn.com
love the peach colors very springy.
ABreading4fun [at] gmail [dot] com
That is just a splendid tutorial. Thank you so very much for sharing your talent so generously.
such a lovely project! I desperately need a new lunch bag, mine stinks!
Oh wow, that is such a cute bag! Love the drawstring touch. Thanks so much!
I love the idea of the eggs not being able to spill out once the little ones have gathered them up! What a beautiful and creative bag!
Love the basket. I think this is one I’m giving a go at. Thanks for the fun.
What a sweet basket. I think I’ll be making one with your great tutorial but I have in mind to make the basket for a new crochet class I’ll be taking and need a designated tote. Thanks!
That is just an adorable & versatile bag! Thank you for sharing
this is adorable!! Beautiful job!
Love the bag. Would be so handy. Tute very clear. Thanks.
What a cute bag and wonderful tutorial. Thank you very much. I love how you’ve created the top so it’s closable.
Oh my gosh, I love this! (love the squiggly quilting too) If I had one of these it is very possible that I would bring my lunch to work more often – these days when I do manage to bring lunch to work it usually gets thrown in my purse and that’s just wrong. Fabulous job. Thanks for sharing.
Such a cute lunch bag! I think I might have to make this one for myself…
Oh my goodness ~ this is way “too cute”. Can’t wait to get mine started!
Thanks for the opportunity to win the fabric and also the tutorial of this
basket.
Hugs!
Now I will need to make one of these for work. Love using it for a gift bag too!
That is so cute! Thanks for sharing and for the giveaway.
This is just soooo pretty!! I love the gorgeous quilted bag and the tutorial is wonderful. The fabric is just perfect….and a giveaway too!! Please put my name in the draw!
Helen x
Great fabric! and your work is impeccable! Thanks for the chance to win!
Oh my! This is too sweet….may have to make one!
This is adorable!! Thanks so much for the tute!! I would love to make this before Easter but I have 4 girls who would want one. I will see what I can do!
Such a cute bag! So neat to have the lining removeable as well. Great quilting! Thanks for the tutorial.
Thank you for a super giveaway and a chance to win.
usairdoll(at)gmail(dot)com
oh that is such a cute project, will be great to take on outside egg hunts
So cute I’d like one! thanks for sharing
Thanks for the adorable project and the chance at your great giveaway.
Omgosh, this is super cute!! Thanks for the tutorial and great giveaway!
I love this lunch pail idea. Very cute and perfect for the days that I get called to sub.Thanks for the chance to win some fabric to make my own.
Your tutorial is so clear and easy to follow- I can’t wait to make this cute basket! And thank you for the giveaway! This blog hop will be such fun!
It`s pretty nice.Thanks for the tutorial and the giveaway!1
Oh your basket is so cute! And such a great tutorial. Thanks for putting the time into it
So cute! Definitely “pinning” this one for future reference!
This will make a wonderful Easter basket for the great grands to gather their eggs. Thank you for the pattern and giveaway. Judy C in NC
I LOVE it! What a wonderful way to welcome spring!
that is so great and really nice tutorial too. thanks for a chance to win your giveaway.
Wonderful tutorial! Thanks for the giveaway!
that little house print in there is so cute! i love discovering new fabric i ‘need’ to get my hands on! this bag is great – thanks for the tutorial. i’m pinning!!
OMG! I could do this… I could make one (or more!) and you make the step by step instructions with photos (bonus!!) so easy!! Thanks for sharing an adorable project… I am pinning this one!!
What a great project…… I would love to make one.
Great tutorial. Thanks for the chance to win your pretty fabric
What a gorgeous bag – I love it!
Your basket is fantastic.
What an adorable lunch bag! I love the coordinating fabrics — great color! Thank you for sharing your creativity & for giving away supplies to make one.
This is great!…a lunch bag. I love the fabric that you used, it’s so cute!
This is such an adorable project. I really appreciate your sharing the tutorial — I can’t wait to make one of these baskets. Thanks for the chance to win those beautiful fabrics, also.
Oh my…this is sooo adorable! I think it would make a great basket for some hexie projects. I can’t wait to make one! I appreciate the tutorial! Thank you!
I LOVE this project! Thanks for sharing! I hope I can get three made in time for Easter
Oh be still my heart. Very cute! Wouldnt that be cute as a sewing basket? Thanks for the chance!
merci de nous offrir ce joli tuto!
bonne journée!
coccinelle
Love love love it! And so will my nieces
Adorable bag – Thank you for the tutorial!
Wow!!! This is such a lovely bag and a great tutorial. Thank you for the tutorial and a chance to win your giveaway.
That is SO cute! It makes me want to get my courage up and try to sew my first bag.
This is such a cute basket/lunch bag pattern and thanks so much for designing it and sharing. The Riley Blake fabric you chose is so cute and “Springy.”
Happy Easter
thank you so much for this tut. The bag is so cute and practical too. I love the fabric.
I LOVE how prolific you are! What an inspiration. Me? I read your blog, go to work, come home and go to sleep and dream about sewing wonderful things like you! Love your ideas.
Love your blog….love the basket!! Thanks for the chance to win a fun giveaway!
This basket is adorable and would make a great Easter basket for Addison or the new baby
This is such a sweet basket! Thanks for the chance to win this darling fabric too!
Oh My Goodness, what a cute idea. I am going to make one for my Secret Pal and surprise her with chocolate goodies inside. Thank you so much for sharing your pattern. Huggles
Aww that is just adorable! I would love a chance to win such a cute prize! Thanks for the great tutorial.
Love, love, love the basket/bag. Would love to win the pack to make my own – with your tutorial, I’m sure I’d have no problems.
That’s the cutest little bucket bag around.!! Thanks for sharing! And for the super giveaway!!
xx Kim
Your lunchbag is sooo cute!! I love to sew bags, so thank you for giving me a new tutorial to follow
Gun, Sweden
You are my heroes! I have been looking for a fun basket to make for my girls for Easter and this is perfect! Thanks so much!
Now, to just find the time to make them.
Adorable, I love the quilting you chose to use!
How adorable!! I would love to win the fabrics and make one of these! Thanks for sharing your tutorial!
Love your Lunch Basket! I haven’t seen one like yours. I am so glad I joined this Easter Bunny Blog Hop. Otherwise, I would have, perhaps, never found out about this site! Thanks for the give away- that Riley Blake fabric is a little hard to find.
I love love this lunch bag. I am printing out the directions to make myself a new one.
A gorgeous project, as always. Thank you for the tutorial!
Totally adorable and wonderful instructions! Thank you!
I madevmyson an easter basket when he was 2 with a bit of ribbon and a couple of felt eggs around it anda bit of glitter. What a beautiful update this will be. Looks like an easy pattern as well. Thanks so much
Your creativity astounds me! Love it!!
This is such a cute bag/basket! And your tutorial makes the assembly so clear.
What a great idea – I have some chick fabric that would be great for this basket ….
Thank you for sharing
I love your lunch bag, it is just lovely and I can’t wait to have a go at making one of my own. I am going to make an insulated one for taking hot food to parties. So delightful I feel like a picnic. Thanks for sharing.
This is so cute. It reminds me of bags my daughter saw in Japan.Plz enter me for the fabric give away. TYVM
This is a must for my little great granddaughter…Love your blog …Thanks for the tutorial. And thanks for the chance to win some fabric….
Oh wow, I want one for every holiday. these are adorable and pack nice and flat for future holidays! they’ll be great on the desk filled with goodies for the coworkers! Thanks for the cool giveaway too!
This is a super sweet, enjoyable way to carry my lunch to work work. Must make!
So cute! I want to make one of these pronto. Thanks so much for the fabric giveaway.
Thanks for the chance to win!!!
I love this bag! Thanks for a chance to win.
It,s a lovely and practical gift. It would make a great teacher gift too.
Cute, cute, cute! This would make a great gift for any girl or girl at heart! Thanks for sharing.
I have to make one or more of these. Soooo cute. Our granddaughter needs one for Easter and I need one to take my lunch to work. Thanks for the tutorial.
This is such a cute little basket.
Love this tutorial!
This is just the sweetest basket! I hope I am motivated enough to get it done for my newest granddaughter in time for Easter!! Thank you so much!!
Your basket is fabulous, thanks for sharing the tutorial.
Love this bag! Thanks for the fun tutorial.
LOVE this bag! Would make a lovely back-to-school (or half-way through school) gift!
what a cute bag. would make a nice easter basket.
Thank you for this tutorial! I just love this bag, love the colors!